

Mobile phone repair has much more than merely changing out the screens and simply changing out the batteries. Professional technicians today work on motherboards, directly replacing failed chips, reflowing solder joints, and reballing motherboards with BGA components. The core of this precision work is the BGA Rework Station, which is a device that places an amateur repair shop on par with a professional-quality shop.
And in case you are planning to do mobile phone motherboard repair in fine detail, at the individual component level, this guide has all the information you need: what a BGA rework station is, how it is used, and what complementary tools will give you a cleaner and faster job.
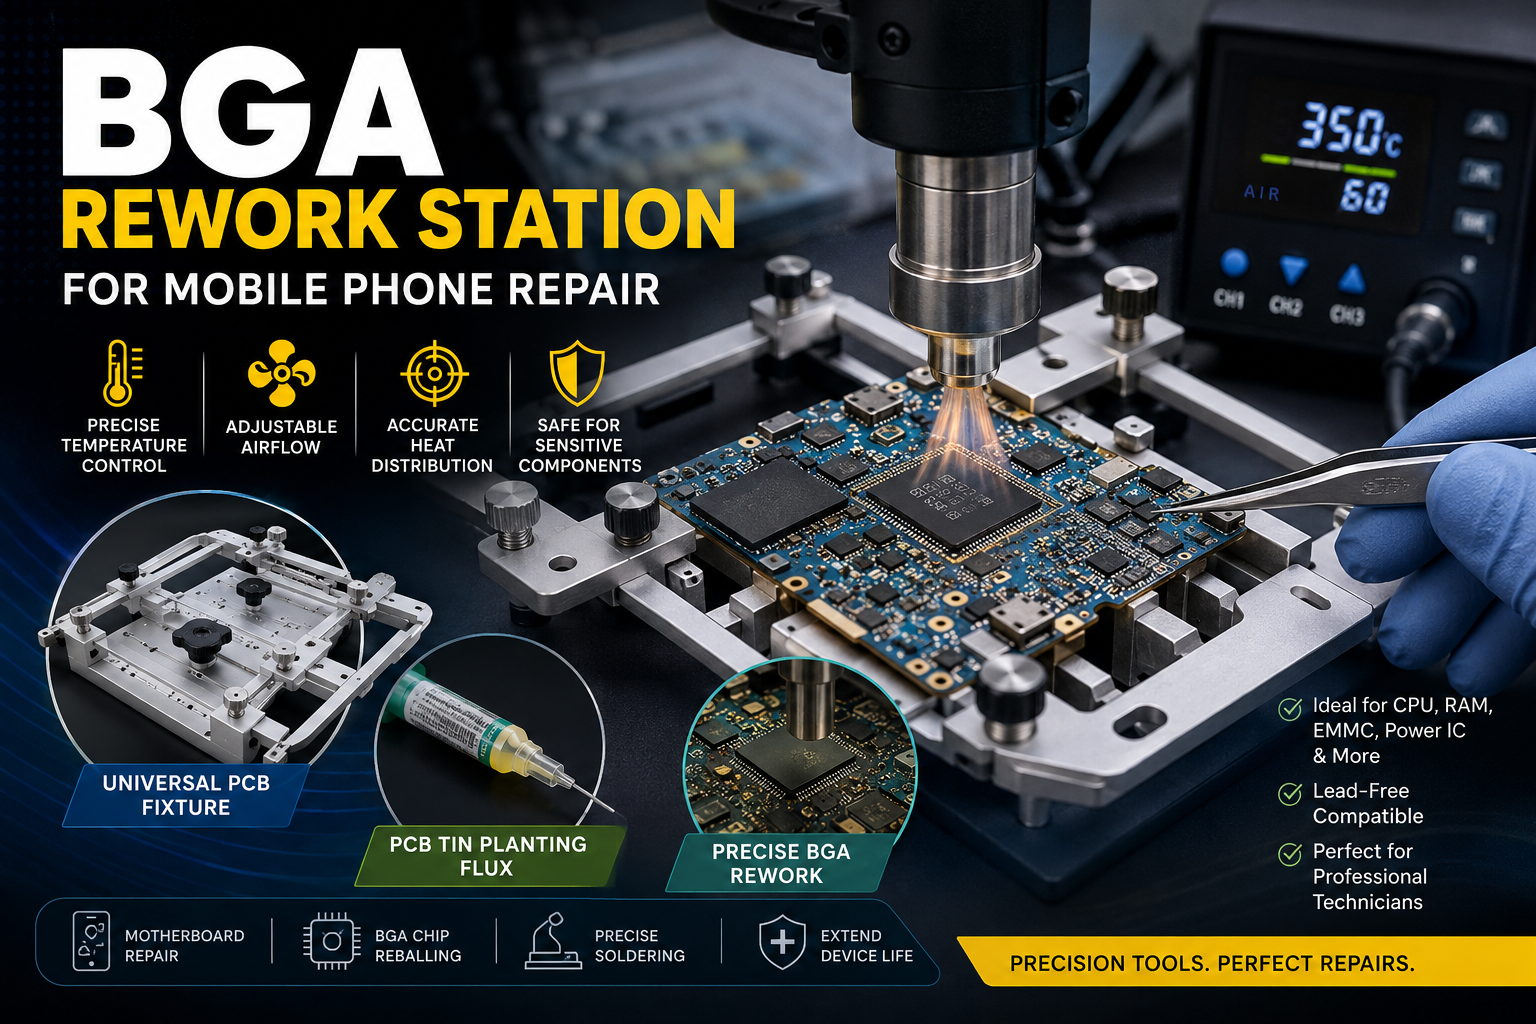
What Is a BGA Rework Station?
A BGA (Ball Grid Array) is a type of specialized PCB soldering and desoldering station designed to remove and reattach BGA chips to PCBs. A significant number of tiny solder balls, in a grid under the component, connect to the board with these tiny solder balls.
BGA rework workstations employ controlled heat with hot air or infrared light, which heats up the solder joints evenly across the entire chip surface. It enables the technician to easily lift the chip, clean the pads, and place fresh solder and re-solder the component without damaging the remaining board.
This method is used in the repair of smartphones, which are CPU-mounted, power management ICs, NAND flash memory, and baseband processors, which are mounted in BGA on the new mobile motherboards.
Why Mobile Repair Technicians Need a BGA Rework Station
Modern smartphones are loaded with dozens of surface-mounted components on a board that fits in your palm. Any failure of any of these components cannot be easily remedied by changing the part, as is possible in older through-hole-based electronics. The requirement of the job would be non-contact, distributed heat, which will be used to melt solder without physically stressing the PCB.
Quality BGA Soldering Station provides you with precise temperature control, adjustable airflow, and replaceable nozzles that concentrate the heat, right where it is needed. Lacking these characteristics, there is a high risk that PCB pads will be raised, surrounding components will burn, cold soldered joints will be created, and they will fail in weeks.
A BGA rework station is not a luxury item to any repair shop dealing with micro soldering in smartphones; it is the backbone of quality work.
How to Use a BGA Rework Station: Step-by-Step
Step 1: Prepare Your Workstation
Check before putting any heat on your motherboard that the motherboard is secured correctly. Universal PCB Fixture is used when the board needs to be held at the right angle, and when the board must not move during desoldering. A stable board implies that there is constant heat distribution and that there are few chances of accidentally moving little passive components around.
Cleaning the working area and cleaning up tools: clean pads, isopropyl alcohol; clean up tools: rework station used, flux, solder wick, and isopropyl alcohol used to clean up pads after removing the chip.
Step 2: Apply Flux to the Target Area
It is imperative to use flux prior to any step of a BGA soldering guide. Use a thick layer of good flux on the chip and around it. Flux decreases oxidation, enhances solder flow, and supports the chip separation easily during the desoldering procedure. It also enables easier reballing since new solder can have proper bonding with cleaned pads.
PCB Tin Planting Flux should be matched to your type of solder added, lead-free or leaded, to achieve consistent melting points and clean first-time coverage.
Step 3: Set Your Temperature Profile
Depending on the chip size, type of solder, and PCB thickness, the temperature settings vary. In the case of lead-free solder (commonly used in modern smartphones), typical desoldering temperatures range between 320 C to 380 C at the nozzle. Always begin with the bottom and move upwards.
Adjust your airflow to a moderate level. Excess airflow carries small capacitors and resistors off the board. Excessive under-dressing will result in uneven heating, resulting in cold joints. Slow, circular nozzle movement at 2 to 3 cm above the chip is used to make sure that there is even distribution of the heat to all solder balls.
Step 4: Desolder the Component
After the solder melts, and you can usually tell this by a little shift in the chip, carefully use tweezers or a vacuum pickup tool to lift the chip. Never force it. In case it is resistant, the solder has not completely melted. Add additional heat and wait.
Upon removal, solder wick can be used to clean up any leftover solder on the PCB pads. Examine pads with a magnifying glass, and then move on. If the pads should be repaired before you try to reball or replace the chip.
Step 5: Reball and Resolder
Apply your flux to the chip and place fresh solder balls on the chip with the reballing stencil. The chip should be placed properly with the PCB pads; any slight amount of offset results in bridging or missing connections. With the BGA rework station, reflow the solder balls to the board using the same controlled temperature profile that you used to desolder the component.
Permit gradual cooling of the board and subsequent testing. Quick cooling puts stress on solder joints and may result in micro-cracks in the joints, which do not manifest themselves until all thermal loads are applied.
Key Tips for Better BGA Soldering Results
It takes discipline and attention to detail to ensure that one gets consistent results when it comes to micro-soldering techniques. The following are the key practices that professional technicians observe:
Desoldering: Preheat the board and then desolder it. Direct heat strikes on cold boards are subjected to thermal shock. A preheating plate maintained between 100 C and 150 C equalizes the heating of the board as well as minimizes the temperature gradient at the target area.
Each chip size is used with the right nozzle. Big nozzles cause heat to be spread on the surrounding parts. Hot spots are formed by undersized nozzles. Ensure that your nozzle matches the chip size as closely as possible.
Pad inspections: Confirm the inspection of pads after removing chips. The most frequent reason as to why repeat failures occur in mobile phone motherboard repair is that of damaged pads. You can spend the additional minute to authenticate the pad integrity before proceeding.
Conclusion
Mastering BGA soldering is what separates a generalist repair shop from a specialist operation that can handle advanced motherboard-level jobs. Investing in a reliable BGA Soldering Station, pairing it with a solid Universal PCB Fixture and professional-grade PCB Tin Planting Flux, puts you in the position to handle repairs that most shops turn away.
The techniques in this BGA soldering guide apply to all modern smartphones. Practice on scrap boards first, stay patient with temperature settings, and always prioritize pad preservation over speed. That approach builds the reputation that keeps customers coming back.