


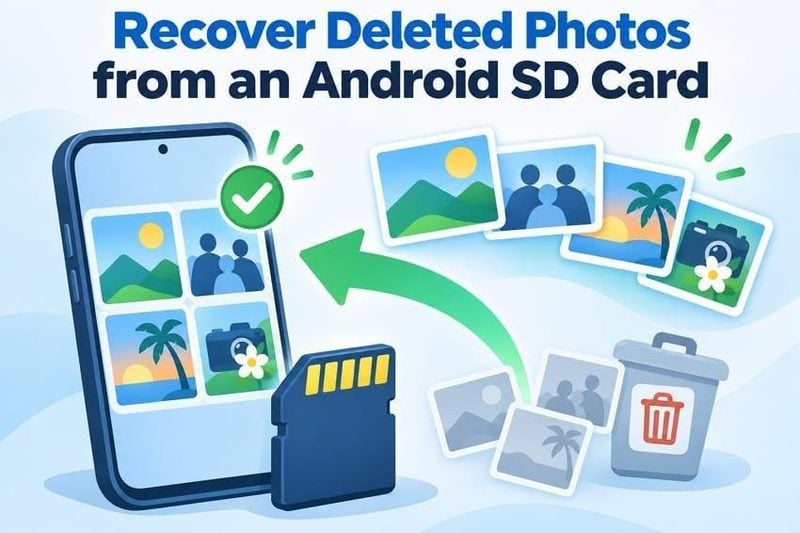
Photos on an Android microSD card can disappear after a mistaken deletion, gallery cleanup, or interrupted transfer. First, stop taking photos and writing new files to the card. Check for an existing copy before attempting recovery. If the card is portable and unencrypted, a Windows PC or Mac with a compatible card reader may help you scan it without relying on the phone’s USB file-transfer mode.
Look for the Photo Copies You May Already Have
An existing photo is usually a better outcome than trying to reconstruct a deleted file. Check the places below first, including any transfer destination that may already contain a complete image. If you need more context about common loss scenarios, Recoverit's guide to recovering lost SD card photos covers additional precautions.
Check Each Gallery’s Trash Separately
Samsung Gallery and Google Photos have separate trash areas. Check the app that originally displayed the missing picture, and then check the other service if you use both. Do not empty either trash while looking for the files:
| App | Where to Look | What the Trash Holds |
| Samsung Gallery | “Gallery > Menu > Trash” | Deleted photos and videos, generally retained for 30 days unless removed earlier |
| Google Photos | “Collections > Trash” | Items kept in Google Photos Trash for 30 days under the current policy, unless permanently deleted earlier |
| Other Phone Galleries | “Gallery > Recently Deleted” or “Trash” | Deleted photos retained according to manufacturer settings |
Google notes that pictures deleted from its app may still exist on a removable memory card. If the card remains readable on your phone, check its DCIM and Pictures folders with My Files or Files by Google as well; the originals may simply have moved.
Confirm the SD Card Folder Was Backed Up
Google Photos does not necessarily back up every folder on a removable card. In Google Photos, tap your profile picture and open Photos settings > Backup > Back up device folders. Look for the relevant camera or photo folder, if listed, and check whether backup was enabled before the loss. Menu labels can vary with app versions.
A backup setting alone does not prove that a particular image was uploaded. Open Google Photos or photos.google.com while signed in to the correct account, and look for the actual missing pictures before assuming they are available to restore.
Search Earlier Transfers and Shared Copies
If a transfer was interrupted, some photos may already have arrived at their destination. Look in these locations before scanning the original card:
- Computer Imports: Check the “Pictures” folder on Windows or the “Photos” app on Mac. Also, look in any folder previously selected for importing photos.
- Interrupted Transfers: If a file transfer stopped midway, some photos may have reached their destination. Open the destination folder and check which pictures were successfully transferred.
- Other Copies: Look for photos shared through messaging apps or uploaded to Google Drive, OneDrive, or Dropbox. These copies may still be available even after deletion from the SD card.
Check How Your Phone Uses the SD Card
The recovery route depends on how Android configured the microSD card. Portable, unencrypted storage is different from adopted internal storage or separately encrypted media. Do not remove or reformat an adopted card simply because a computer cannot read it.
Portable, Adopted, and Encrypted Cards
On your phone, check Settings > Storage for the SD card and its storage mode. Menu names vary across Android versions and manufacturers. The distinction matters because a card reader cannot bypass encryption:
| Setup | How It Appears on the Phone | Computer Recovery |
| Portable Storage | Separate SD card storage for photos and files | Possible through a compatible card reader |
| Adopted Internal Storage | Used as part of phone storage; may contain apps | Cannot be mounted on another device because its encryption keys are tied to the original phone |
| Samsung Encrypted SD Card | Removable card encrypted through phone security settings | Requires decryption using the original device |
A portable, unencrypted card can usually be connected to another compatible device. Adopted storage, however, is encrypted for the original Android device, and a Samsung-encrypted removable card should be decrypted through its original device when the necessary access is available. Do not change the storage mode, initialize, or format the card while files are missing.
When to Remove a Portable Card
For a portable, unencrypted card, stop using apps that may write to it. Use the phone’s Eject or Unmount control under Settings > Storage when available, then power down if needed before removing the card. Check the card for damage, and do not insert it into a reader if it is cracked or overheating.
Stop Here If the Card Is Encrypted
If the microSD card was adopted as internal storage or separately encrypted, keep it with the original phone. A Windows PC or Mac may show an unreadable volume and offer to format it; cancel that request. Standard removable-card scanning is not a way to bypass device encryption.
Do not factory-reset the phone or migrate the adopted card in an attempt to fix the problem: this may remove access to the relevant encryption keys. Check existing cloud or local copies first and seek device-specific advice for valuable encrypted data.
Scan a Portable Card on a Computer
If you have a stable, portable, unencrypted microSD card and no usable copy, connect it to a Windows PC or Mac through a compatible card reader. A computer scan requires access to the card as storage; simply connecting the phone in USB file-transfer mode is not equivalent.
Connect Through a Compatible Card Reader
Choose a card reader that supports your microSD card and its capacity (including SDXC support for cards larger than 32 GB). Insert the card, connect the reader, and check that the computer detects it. Do not choose Format, Initialize, or Repair if a warning appears.
Identify the actual card before opening recovery software. A drive letter or volume name can change after reconnecting a reader, so confirm the approximate capacity as well:
- Drive listing: On Windows, check This PC; if the volume does not mount, use Disk Management to see whether the physical card is detected. On a Mac, check Finder and Disk Utility > View > Show All Devices. Do not create a new partition to make the card appear.
- Photo folders: If the card opens normally, look for DCIM or Pictures. If the file system will not open, avoid repeated browsing or repairs and assess whether the physical card is detected consistently.
Use Recoverit to Find and Preview Photos
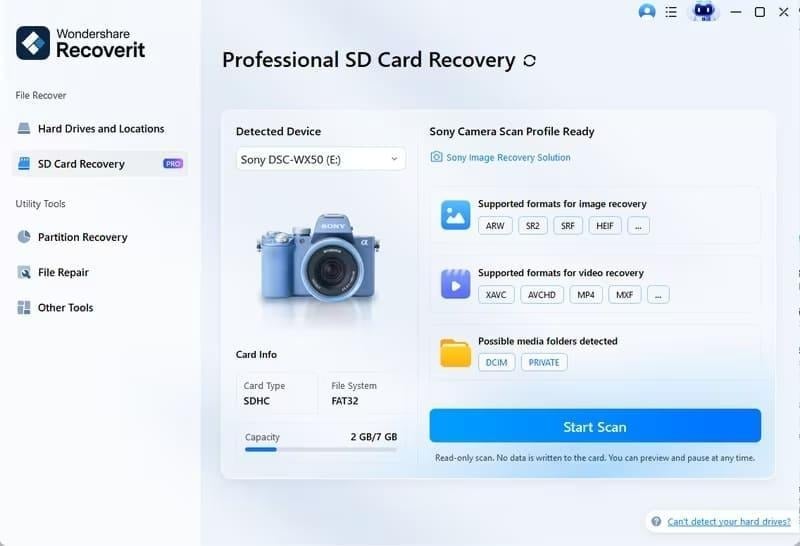
If no intact photo copy is available and the portable card reads consistently, Recoverit's SD card recovery software can scan supported microSD, microSDHC, and microSDXC storage from a Windows PC or Mac. Its purpose here is to locate and preview deleted images before saving recoverable copies elsewhere, not to decrypt adopted storage or repair a physically failing card.
Recoverit offers scanning and previews of supported files, while the amount that can be exported without payment depends on the installed edition and current terms. Some SD Card Pro versions also offer AI Search, but it is not a standard step in every version. The workflow below focuses on choosing the correct device, finding the relevant photos, and saving safely.
Step 1. Select the SD Card for Scanning
Open Recoverit on your PC or Mac and find SD Card Recovery or the corresponding removable-media option. Choose the connected card by its name and capacity and start the scan when the card is stable.
Step 2. Scan and Locate Missing Photos
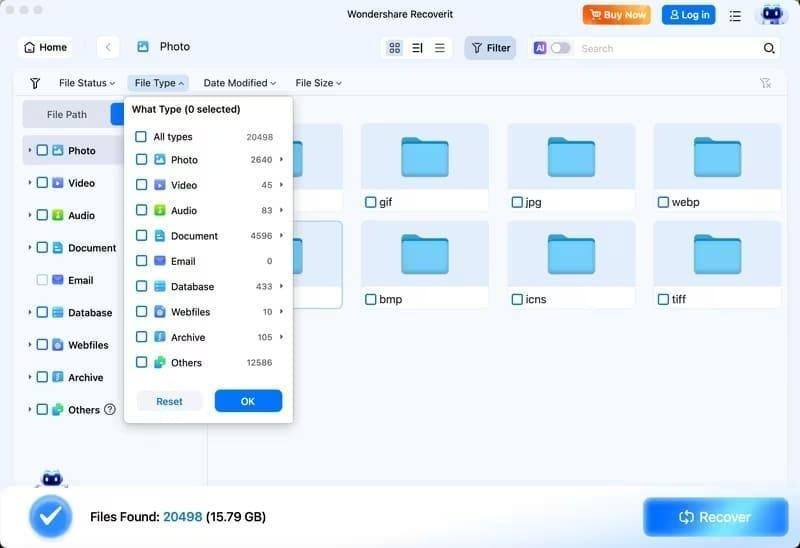
Allow the scan to inspect the readable card. Check the Photos or Pictures category and use available file-type, date, or filename filters to narrow the candidates. Preview recognizable JPG or PNG files instead of relying on the number of scan hits.
Save the Photos to a Different Storage Location
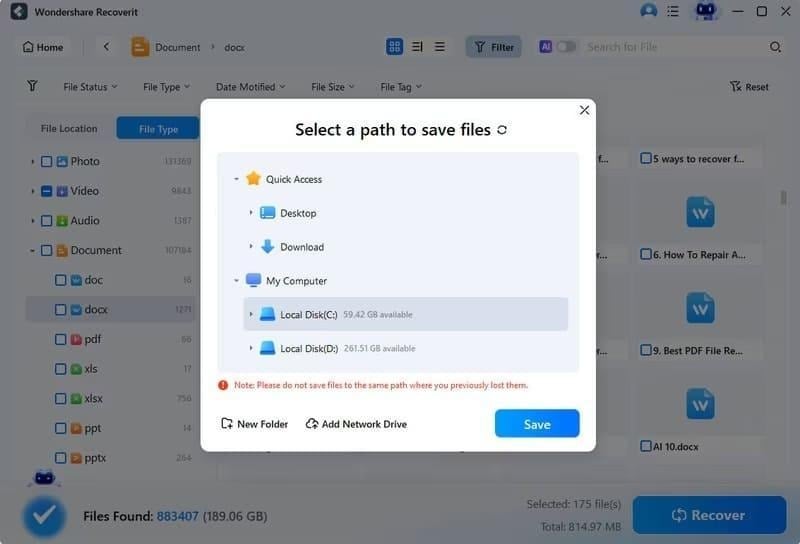
Select the files you need and click Recover. Choose a folder on the computer or another healthy drive—not the affected microSD card—as the save destination. A preview or filename in the scan is not proof that the exported image is complete; open the saved file separately to check it.
Bring Verified Photos Back into Your Library
Before importing anything into your Android photo library, verify the recovered copies. Thumbnails can look normal even when the underlying JPEG file is incomplete; importing broken copies may spread them into your synced libraries.
Check Full-Size Images, Not Thumbnails
Open several representative files at full resolution, including important or large photos. Use these checks to distinguish usable images from incomplete scan results:
- File Size: Sort recovered photos by size and compare them with known originals when available. Unusually small files could be thumbnails or incomplete images.
- Full view: Open the image in Windows Photos or macOS Preview, zoom in, and look for missing image regions, unusual colors, or files that fail to load.
- Capture Date: Check “Date taken” in Windows File Explorer or the image metadata in Mac Preview's “Inspector.” Recovered photos without original metadata might not show their actual capture dates.
Copy Verified Photos into Your Library
Once you have verified the photos and made a second copy, you can return them to the library you normally use:
- Google Photos: On the computer, open photos.google.com, sign in to the intended account, and upload the verified images. They should appear in Google Photos on your Android phone when using the same account.
- Gallery apps: From Windows, connect an unlocked Android phone by USB and enable File transfer if supported. Copy verified images to the phone’s Pictures folder, not onto the affected SD card. Allow the gallery app time to index them.
- Mac: Upload verified photos to Google Photos, or use a currently maintained, compatible MTP transfer app for USB transfers.
When the Card Is Unreliable or Unscannable
If the card is missing even at the disk-device level, reports No Media or an incorrect capacity, overheats, or disconnects repeatedly, stop DIY scans. One check with a known-good reader or port is reasonable; for important photos, ask a qualified recovery specialist about the options and costs. Replace an unreliable card after securing verified copies and turn on backup for relevant photo folders on the replacement device.
For an Android SD card, the safest order is to preserve the original, check existing copies, and scan only a stable, unencrypted portable card. Verify the exported full-size photos before using or replacing the original storage.