


Android phones have quietly become the place where a lot of creator work actually happens.
Not the polished, agency-approved version of creator work. I mean the ordinary version: saving ideas in Notes, screenshotting references, replying to comments, trimming a clip, checking how a post looks in vertical format, then realizing you still need one more image before you can publish.
That is why AI tools feel more useful on mobile than they sometimes do on desktop. The phone is already where the idea starts.
I wanted to test a simple workflow: could I start with one AI portrait, turn it into a vertical creator-style visual, then prepare it for a short video without opening a desktop editor? I used APOB AI in a mobile browser-style workflow and kept the test deliberately small. No complicated production plan, no camera crew, no 40-layer editing timeline.
The result was more practical than I expected.
Why this works well for Android creators
Android has been moving deeper into AI-assisted workflows. Google described Android in 2026 as shifting from an operating system into an “intelligence system,” with AI helping users complete tasks across apps more naturally (Android Developers Blog, 2026). You can see the same direction in everyday use: Circle to Search, Gemini features, smarter photo tools, auto summaries, and more creator tools running directly from the phone.
For creators, that matters because speed is usually the difference between posting and abandoning an idea.
An Android user does not always need a full video studio. Sometimes they need:
- A vertical visual for a Reel, Short, or TikTok.
- A simple talking-point clip for a product page.
- A thumbnail variation.
- A finance, app, or deal-themed graphic.
- A quick test before investing in a larger shoot.
That is where a browser-based AI workflow can fit in.
Step 1: Start with a simple creative brief
The mistake I see people make with AI video is starting with a huge prompt. They ask for a cinematic commercial, product demo, influencer campaign, lifestyle scene, motion design, and brand story all at once.
For mobile content, smaller is better.
For this test, I used a very plain prompt:
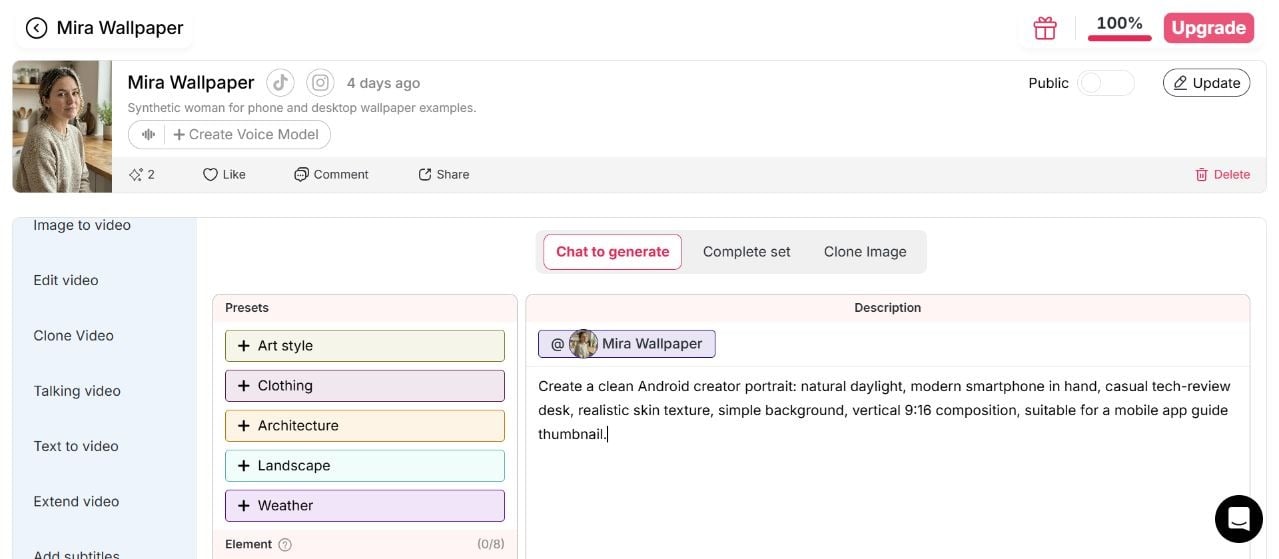
Create a clean Android creator portrait: natural daylight, modern smartphone in hand, casual tech-review desk, realistic skin texture, simple background, vertical 9:16 composition, suitable for a mobile app guide thumbnail.
That prompt works because it defines the subject, setting, device context, composition, and use case. It does not overload the tool with unnecessary adjectives.
If you are making content for Android users, I would keep a small prompt template like this:
Create a [format] for [audience], showing [subject] using [device/app], in [setting], with [lighting/style], designed for [platform].
For example:
Create a vertical thumbnail for Android app users, showing a creator comparing two video drafts on a phone, in a clean desk setup, realistic lighting, designed for a YouTube Shorts tutorial.
Step 2: Generate the first image
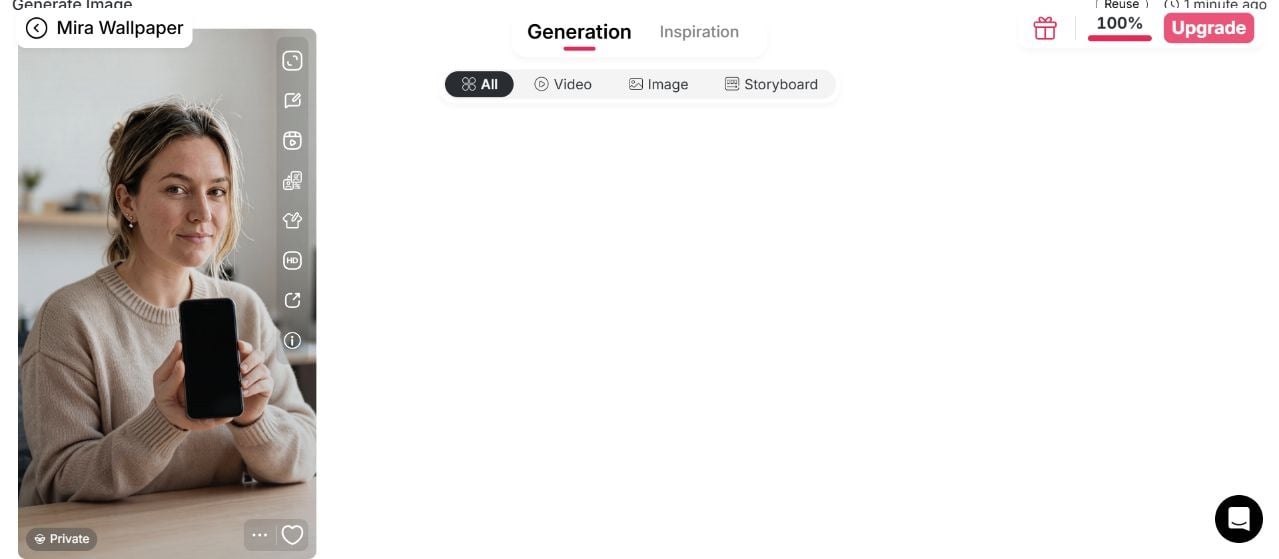
Inside APOB AI, I opened a saved portrait model and used the image generation panel. The interface lets you choose the prompt, image quantity, aspect ratio, and quality.
For mobile-first content, I would usually pick:
- Quantity: 1 for testing, more only after the prompt works.
- Aspect ratio: 9:16 for Shorts, Reels, TikTok, and phone wallpaper.
- Quality: use a higher quality mode if the image will be repurposed across multiple channels.
- Prompt style: describe the scene like a photo brief, not like a keyword dump.
In my test, the first output was a vertical image of a person holding a phone at a desk. It was not trying too hard, which is actually useful. It looked like something that could sit inside a practical app guide instead of a fake ad.
Step 3: Turn the still image into a short video idea
A still image is useful. A short video is usually more useful.
For this step, I opened the image-to-video workflow from the generated result. APOB AI lets you use the generated image as a reference frame and then describe how the scene should move.
This is the part where you should be specific but not dramatic.
Bad motion prompt:
Make it viral and cinematic.
Better motion prompt:
The subject slowly lifts the phone toward the camera, gives a small smile, and the camera makes a subtle push-in. Keep the background stable and realistic.
That kind of prompt gives the model something concrete to animate.
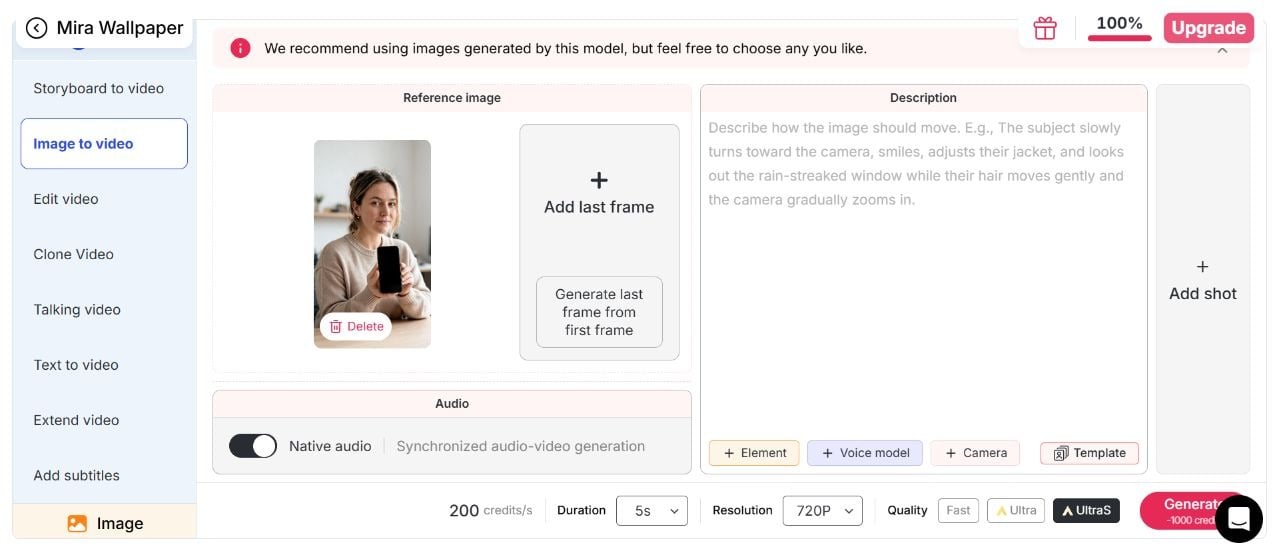
If your goal is short-form content, APOB's AI video generator is the better page to reference because it matches the actual workflow: create a visual, define movement, generate a short clip, then reuse it across social channels.
Step 4: Build variations before publishing
One image or video is rarely enough. The real advantage of AI is variation.
For an Android app guide, I would create three versions:
- A clean tutorial-style portrait.
- A more energetic social thumbnail.
- A product-focused version where the phone screen or app action is the main subject.
For a finance app, budgeting app, deal roundup, or affiliate offer, I would also create a money-themed visual set. That does not mean promising easy money, which is the fastest way to make content feel spammy. It means using money-related visuals carefully: receipt-style graphics, savings icons, cashback scenes, budget planning shots, or creator monetization thumbnails.
For that kind of supporting asset, APOB's AI money generator can be used as a visual idea tool rather than a “get rich” claim. The safest use is to create background imagery, campaign concepts, or money-themed graphics that support a real article or app review.
Step 5: Check the result like an editor
Before publishing, I would check four things:
- Does the phone look natural?
- Are the hands and screen believable enough for the use case?
- Does the person look consistent across variations?
- Is the vertical framing clean on a small Android screen?
I would also avoid using generated visuals for anything that looks like a real testimonial unless it is clearly labeled as a synthetic or illustrative asset. For guides, thumbnails, and concept images, AI visuals are much easier to use responsibly.
Where this workflow fits
This is not a replacement for real product screenshots, hands-on reviews, or original camera samples. TalkAndroid readers are used to practical coverage, and a fake “review” visual would be the wrong use.
But for creator workflows, app explainers, tutorial thumbnails, and campaign drafts, this kind of AI pipeline makes sense. It lets you move from idea to test asset quickly, especially when you are working from an Android device and do not want to wait until you are back at a desktop.
My takeaway is simple: AI video tools are becoming useful when they stop trying to be magic and start acting like a fast pre-production assistant.
That is the workflow I would keep.