


HTC Video Highlights is probably the best feature I have seen on a smartphone in a long time, but nothing is perfect. If you utilize Zoe and Video Highlights as often as I do, you probably have gotten a little bored of the music. I tend to use only a couple of the filter effects, which means the same song over and over and over. Don't get me wrong, they are good jingles, but it would be nice to be able to use whatever song you want. I am sure HTC will either offer more songs and/or the ability to use your own stuff in the future, but that might not be for a while. In the meantime, I came up with two very simple solutions to change the song on your Video Highlights to whatever you want. Don't worry, you don't need any elaborate desktop editing software. In fact, you can do it all from your phone. Hit the break to get started.
Option 1 – Using your phone
**If you would rather watch how this is done, skip to the video below.
Save your video highlight as an mp4
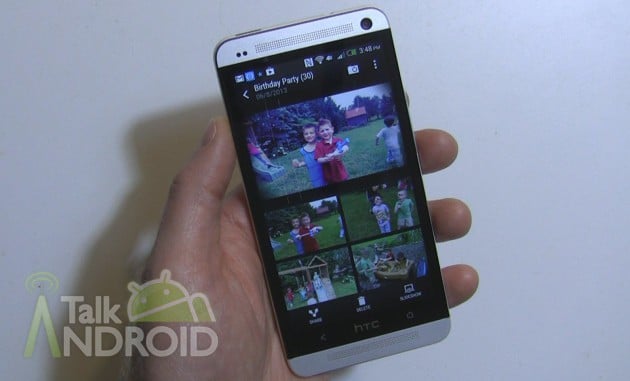
The first thing you will need to do is save your video highlight to your phone as an mp4. I am assuming if you are reading this guide, you know how to get to your video highlights and make adjustments. If not, see our previous guide. Once you have decided on a Video Highlight that you like, hit the three dot menu at the top right while the video is playing, tap save, name the file to whatever you want (or keep their default), and tap OK. After about 30 seconds, the video will be saved to your gallery in the “Video Highlight” folder under “Albums”.
Cut the portion of the your chosen song
Next up is to cut the portion of the song you want. This song needs to be on your HTC One. You want to grab a free app from the Play Store called ringPod, which edits mp3 files for ringtones. I know these apps are a dime a dozen, but I prefer this one because it has an easy option to fade the last few seconds of the song, which is important.
Open ringPod and select the song you want to use for your video. You will then see the first 15 seconds of the song already highlighted. What you want to do is tap the box next to “End” (at the bottom) for the end time and change it to 33.00 for 33 seconds. The selected area will now change showing 0 to 33 seconds. You can now hit play and listen to this “selected area”. If you want another area of the song, slide the selected area over different parts of the song keeping the 33-second limit. I should also point out that your highlight video will show as 32 seconds long, but definitely make your song 33 seconds to make sure the video editor doesn't try to loop it.
After you are happy with the chosen part of the song, hit the three dot menu at the top right and select “Fade and Volume”. In rare instances, you can skip this step if the song sounds right, but most of the time you will want to add the number of seconds for a “Fade Out”. I have been using 4 seconds, but you can play with it and decide what you like. By using 4 seconds, it will start fading right when the HTC Ad appears at the end of the video.
Now all you have to do is save the selected area as a new song. After tapping the disk icon at the top, you can choose either alarm, music, ringtone, or notification for the type. It really doesn't matter what you choose, but I use “music”. This way all my edited songs will be in the music folder. Name the file whatever you want and tap “Save”. Don't worry, your original song will still be intact.
Now you have a video and a song. The only thing left is to join them in holy matrimony.
Combine the Video Highlights and the Music
I recently reviewed WeVideo, which is a video editor. There are a number of video editors, so you can try whatever you want, but I found WeVideo to have all the features needed to make this simple and painless. If there is one issue in using WeVideo, it's the fact that it will downgrade your video to 720p, but I don't consider that a big deal at all. If you really want a 1080p version, you can pay 99-cents for it.
You can refer to my review of WeVideo for more information, but we are going to keep things very simple for this application. Since WeVideo is a cloud solution, you will need to create an account. You can simply log in with your Gmail account, Facebook, or another email address.
After you are set up, the first thing you want to do is start a project and name it. You are then given the opportunity to add videos, images, and music to your project, but we are going to add only one video and one song. Before you do anything, tap on the title box that is already in the timeline. Check, “NO TITLE FOR MY VIDEO” and tap “Done”. Ultimately you can leave the title in place, but it will add to the length of your video, which means you would need to make the appropriate adjustment to your song. I choose to go without the title in order to preserve what HTC is doing.
Next up is to insert the Video Highlight (mp4) that you saved earlier into the timeline. Just drag it into the timeline below. Now tap on the video (after it is in your timeline) to make one quick adjustment. Tap on the “Volume” tab and slide the volume down to zero and tap “Done”. By doing this, the HTC Song on your original video will not be heard. If you're worried about the original video, it will still be intact in your gallery.
Since we aren't going to add any images, just swipe over to the Audio section and select the song that you made with ringPod. It should be easy to find since “ringPod” will be the artist for all songs that you edit. Just tap on the song and you are good to go.
The next step is to preview your work of art. Just hit the play button at the bottom left to watch the video with your song. At this point, you should be happy with the result, but if there is anything that is unsatisfactory, it will mostly likely be the song. You can still go back to ringPod and make another adjustment and swap the song clip.
Assuming you like everything, just tap “Publish” at the bottom right. Your video and music will be uploaded to and rendered at the WeVideo site. You can check “Save a local copy” to save the video to your phone, and if you added your YouTube and Facebook accounts, you can automatically upload the finished product to those sites as well. Once you have decided on these options, just tap “Publish”. It can take as much as 10 to 20 minutes to complete, but it all happens in the background, so you can do other things.
Once your video is completed and/or uploaded to social sites, you will get a notification and an email letting you know. If you chose to “Save a local copy”, you will find your video in the gallery in the “Movies” folder under “Albums”. It will be an mp4 file so you can do whatever you want with it. You can save it in Dropbox and/or upload it to any site you want.
If you ever want to change it to another song, you will be able to easily since your projects will be saved in WeVideo. You can also go to the WeVideo website and edit via your chosen browser if you so wish.
Sometimes reading the instructions can be grueling so I put together this hands on video showing you each and every step. Trust me, this is very easy.

Note: By using copyrighted songs, you could run into a problem with YouTube even though you aren't using them for commercial purposes. Most of the time YouTube will only ban your video from certain countries, but if this is an issue, you can search for various royalty free music online that you can use. If YouTube is going to be your main area for sharing, you might want to take a look at option 2 below.
Option 2 – Using the YouTube Editor
If you don't mind using your desktop and you plan on using your video on YouTube, you can easily change the music by using the YouTube Editor. There are a couple of drawbacks. One is that you can only use the music that is partnered with YouTube and the second is that you can't apply a fade. On the plus side, you will be able to retain the 1080p video quality and you don't have to worry about YouTube taking your video down because of copyrights.
Just upload your video to YouTube and go into the Editor. Select audio and select any song from the library. You can preview it before saving it. If you like the result, just click save and your video will be updated with the chosen song. There are over 150,000 songs, but unfortunately it isn't so easy to find what you're looking for. However it is an alternative that works and is quite simple.
If you want to see our other guides regarding the HTC One, click here. Also look for my next guide on how to make longer Video Highlights because sometimes 30 seconds isn't long enough.
Sadly, 18 months in, they decided to break the app, making uploading to their servers mandatory (no more local saving and sharing privately with friends and family) and limited the maximum length to 30 seconds so forget about making a nice Zoe of your holiday, unless you want to make one each day.
If anybody knows of an alternative app, let me know!
You need root; then you can get your hands on the original rom, unzip it, pull the camera, videoplayer, gallery, and zoe apks and replace them in your app-private directory (don’t forget to change the file permissions). Just disable auto update in the play store to keep them as is.
Thank you for this Robert, a very clear and useful guide. I’ll have to read the one about extending the clips next. I just deleted 6 gigs of photos, Zoes and videos from the phone…after less than two weeks usage! I guess this means that having set my phone up with pretty much all the apps, files and music I want on it, I only have 14 gb to play around with for the next two years.
It’s a shame that HTC limited such a data hungry phone to 32 gb, but what a phone
When i look up Wevideo this is what i get.
Try doing it from your phone. What country are you in?
Same outcome
Actually that screenshot is from my phone
USA, my bad when trying to access it from the phone it doesn’t even find it
from the phone’s play store
Are you the AT&T version or an unlocked one?
Stock, Sprint version
I have AT&T.. Will contact We video folks and see what’s up.
Thanks for your help
I emailed you for some additional screenshots I need.
You should be good to go now. There was an issue with the Play Store and the WeVideo folks corrected it.
from the phone
ok , start for my smart phone ….. easy