


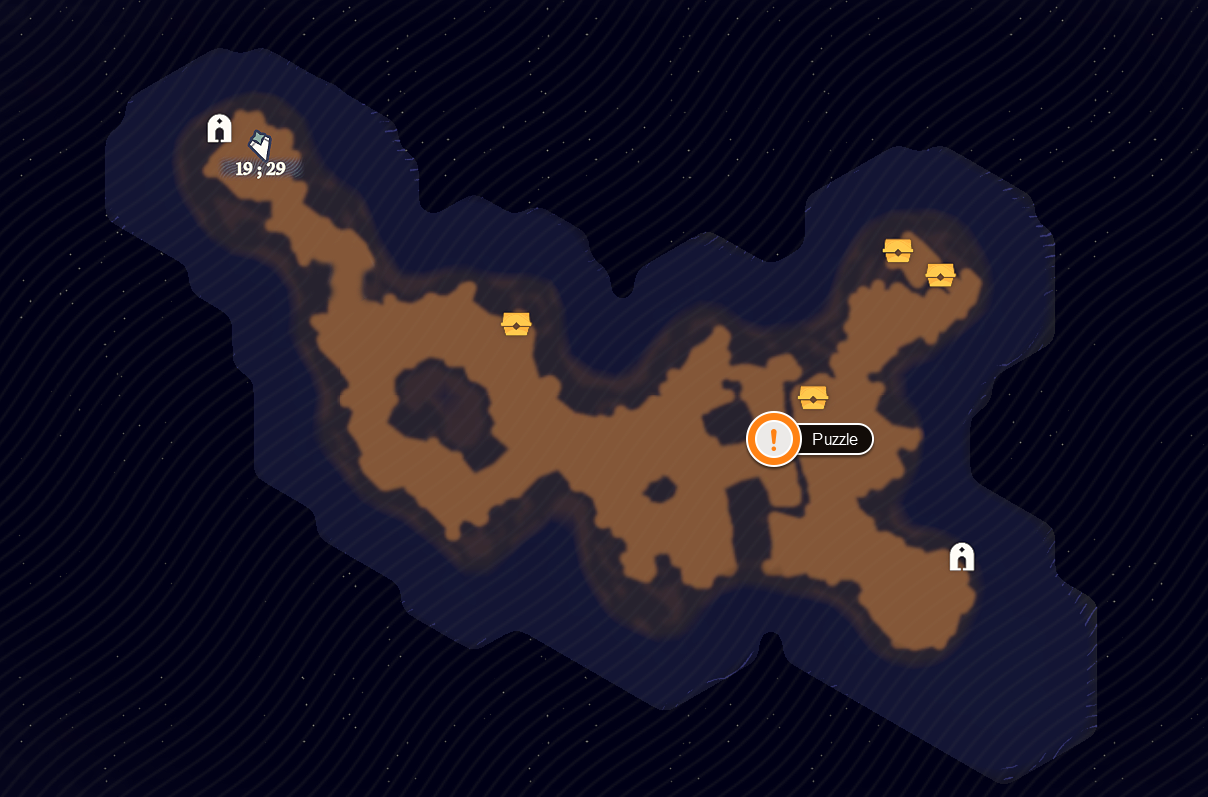
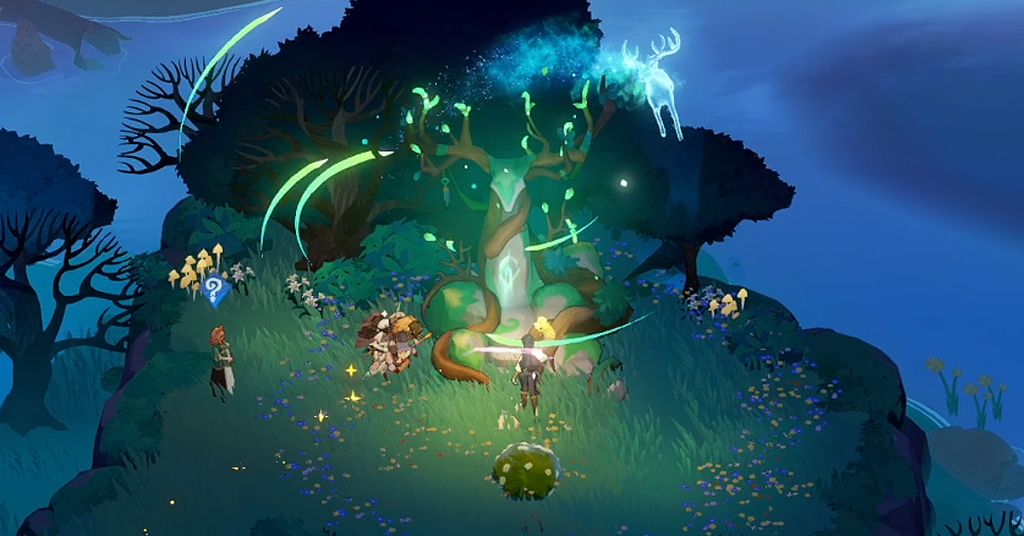
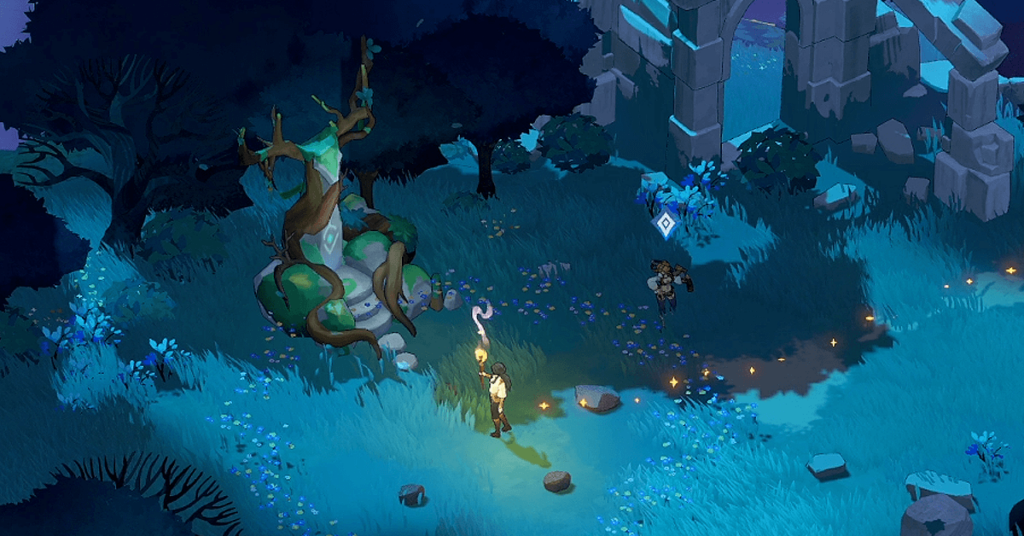
Treasures in AFK Journey hold plenty of surprises, such as gold, diamonds, hero essence, gears, and even invite letters to recruit your beloved heroes. These treasures are scattered throughout the world, with some concealed behind puzzles or guarded by strong enemies. These treasures are hidden behind the mist that will only reveal its secrets once explored.
In this article, we will equip you with a map and a list of puzzles to unravel, guiding you to unlock the abundance of riches in the AFK Journey universe.
As we explore new sections, additional maps will be added in the future. Stay tuned for more Treasure Location updates.
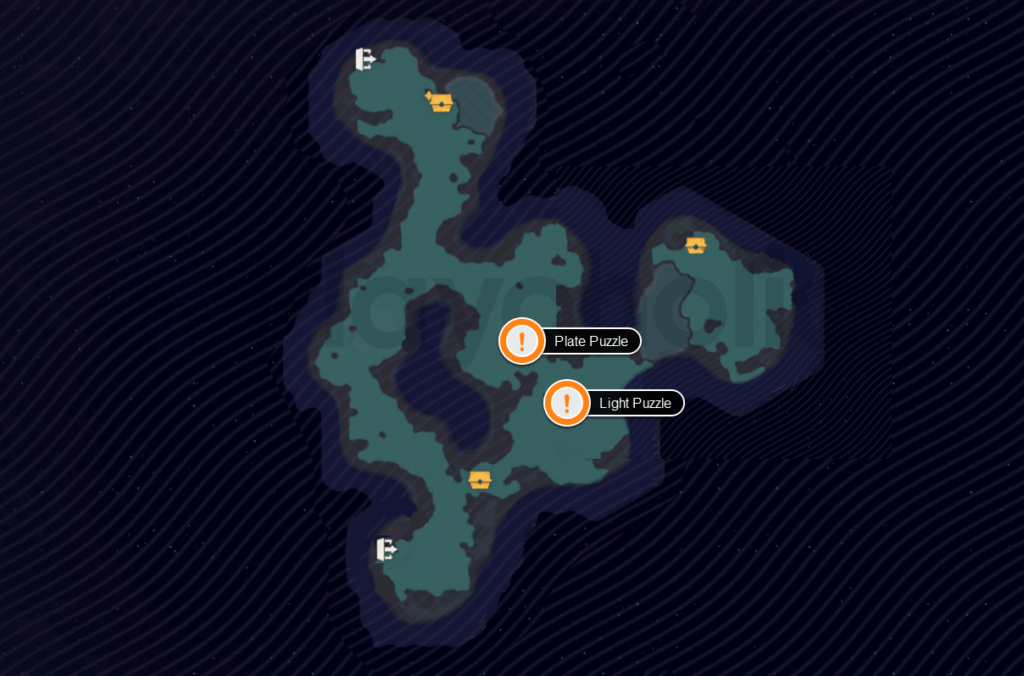
Holistone

Golden Wheatshire 1

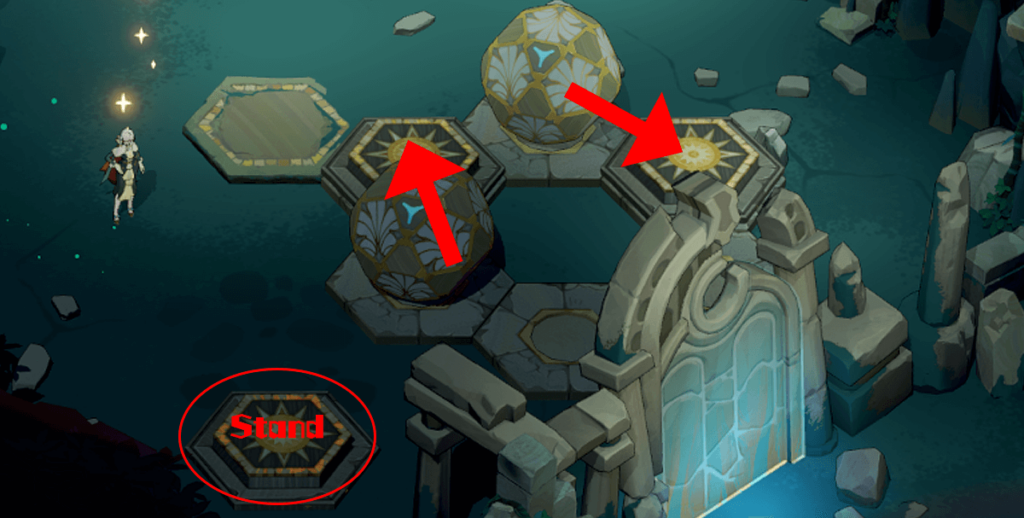
Ruin Cavern Puzzle
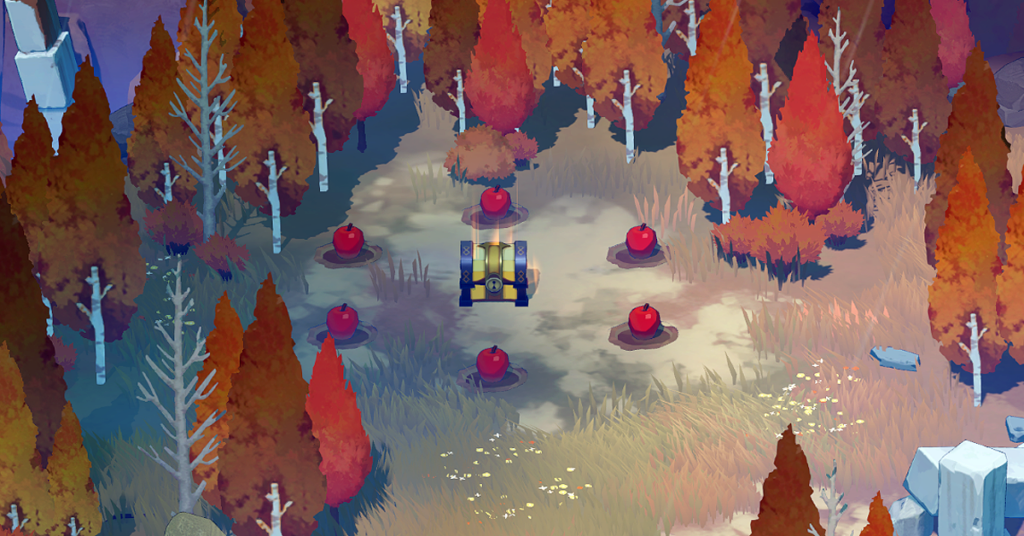
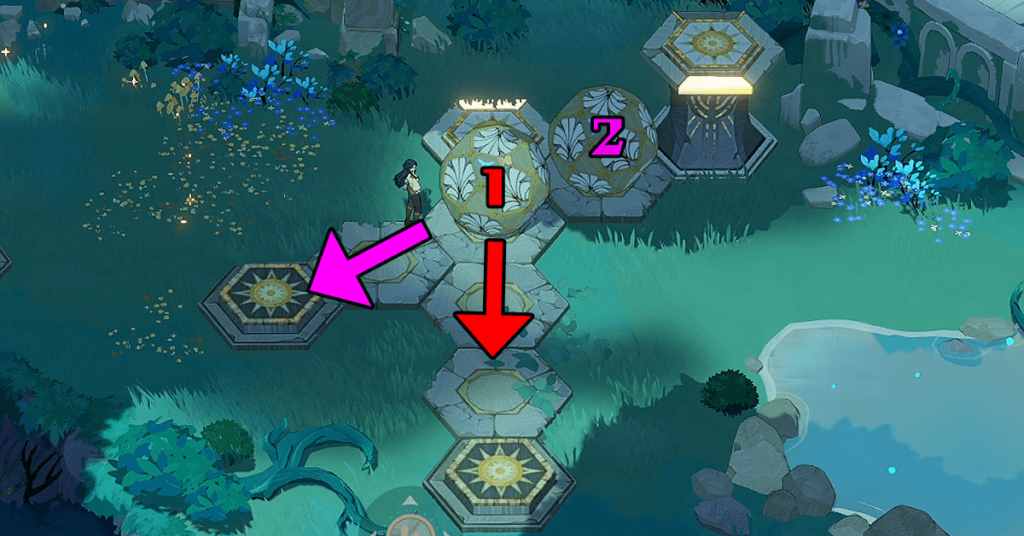
- At the center of Golden Wheatshire 1, you will encounter a blocked section preventing you from reaching the treasures ahead. To access them, head northwest of Golden Wheatshire 1 and enter the hidden entrance.
- The hidden entrance leads you to a Ruin Cavern, where you must solve an easy puzzle to proceed.
To solve the puzzle, all you have to do is push the round blockage to clear the pathway. Simply run towards it until the action auto-prompts, and continue pushing until the round boulder reaches the last pressure plate.
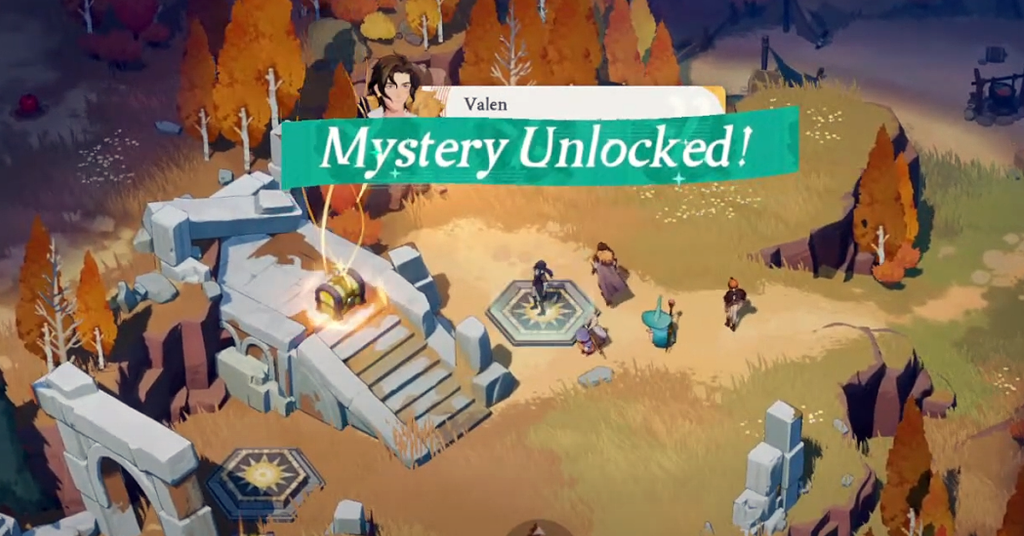
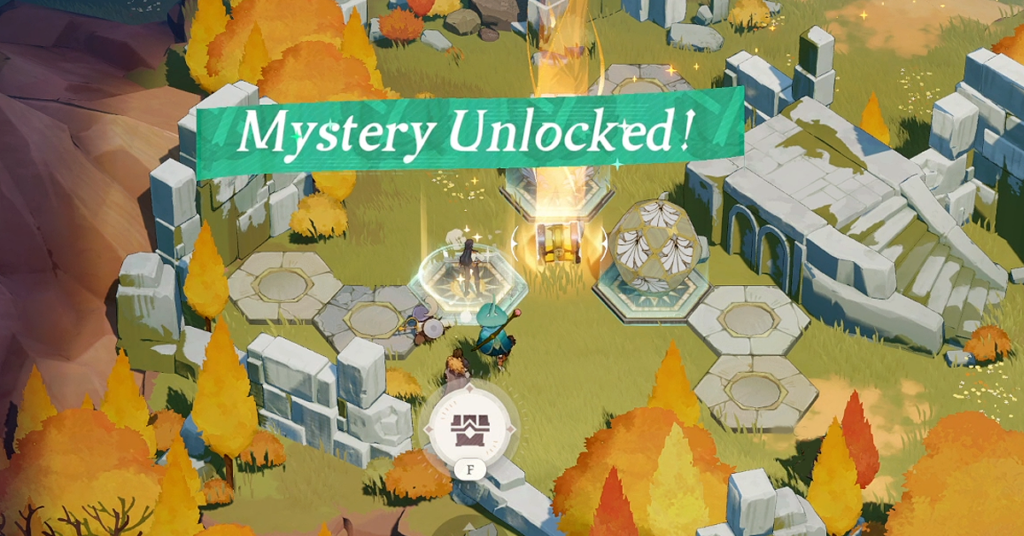
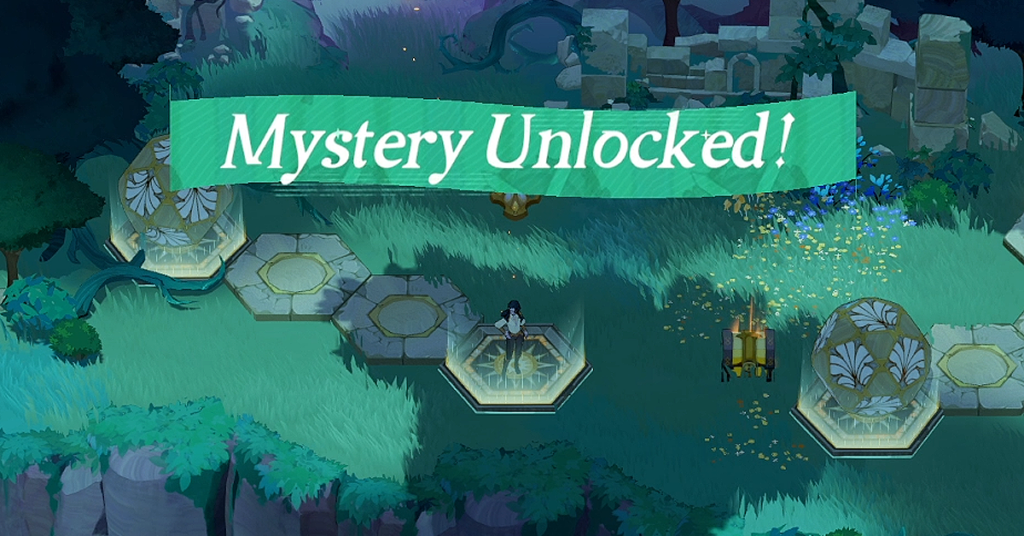
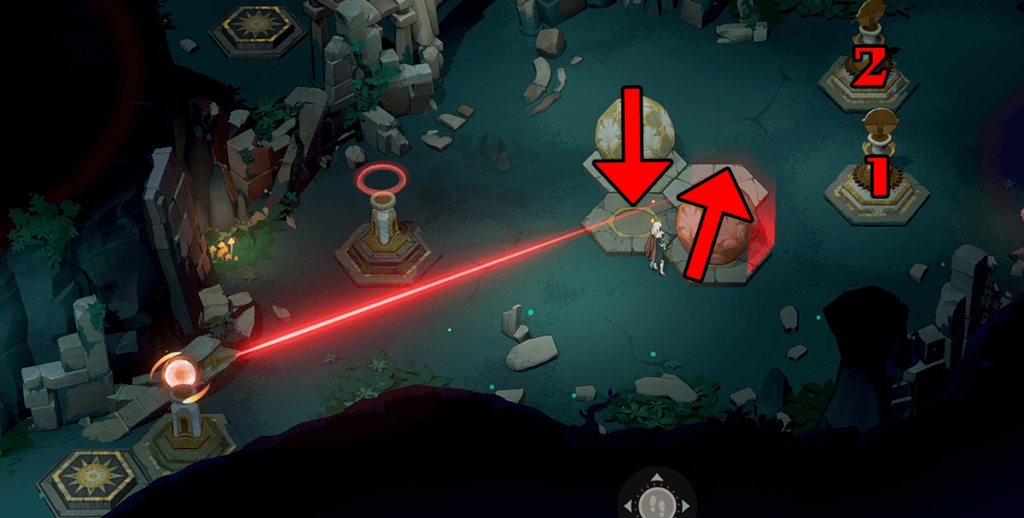
Once you're out of the Ruin Cavern, ignite the explosive keg or barrel to remove the blockage, granting you easy access back to town. But before leaving, step on the two pressure plates to complete the mystery and reveal the Large Chest.

Golden Wheatshire 2
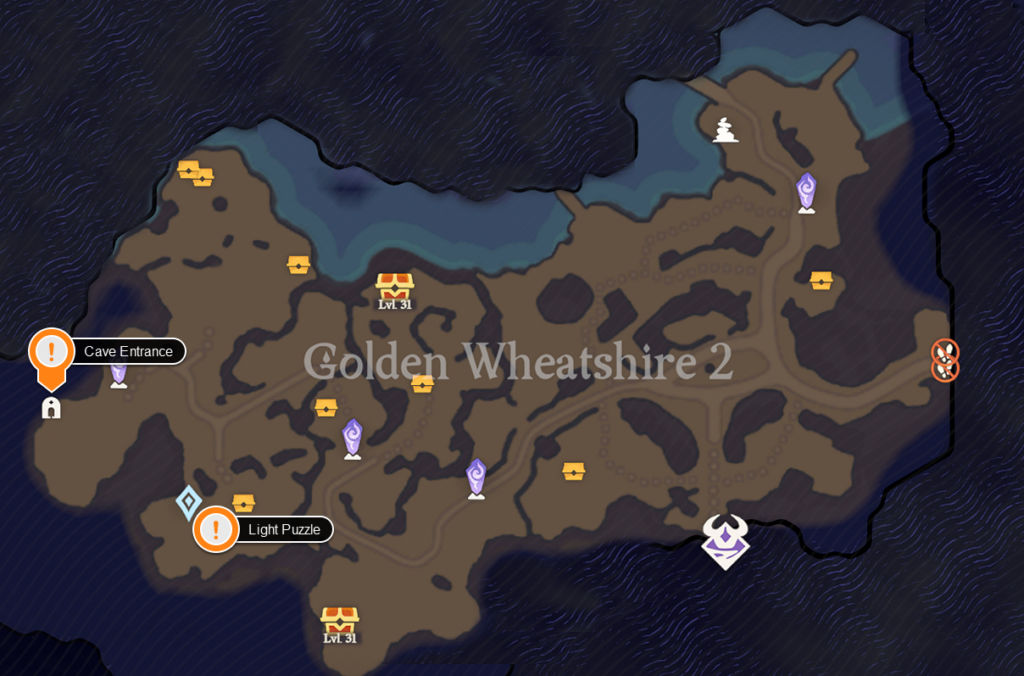
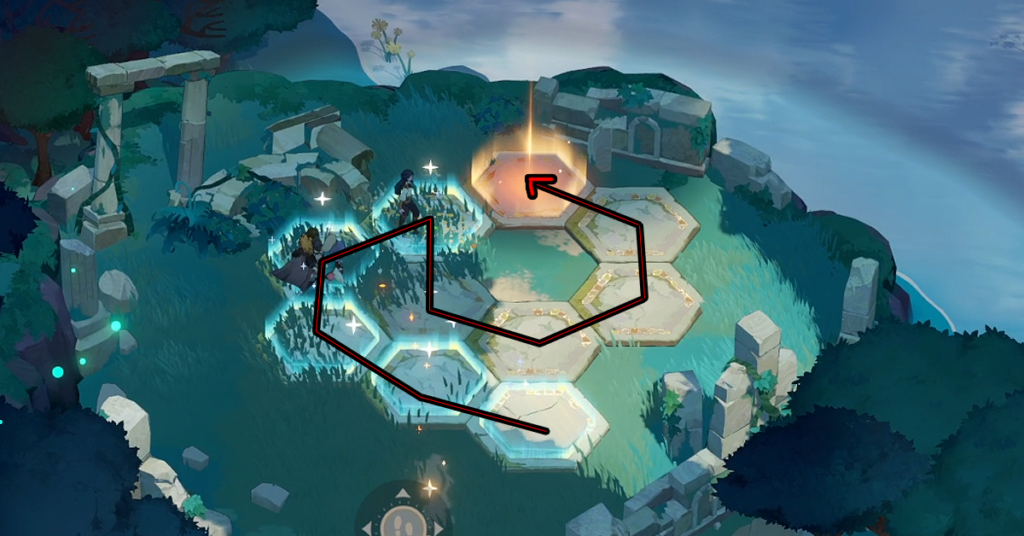
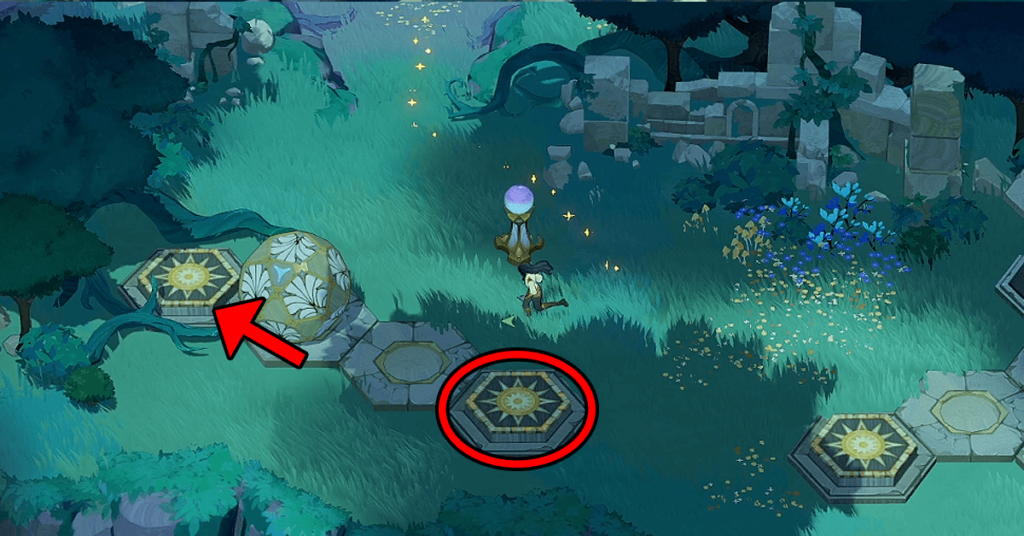
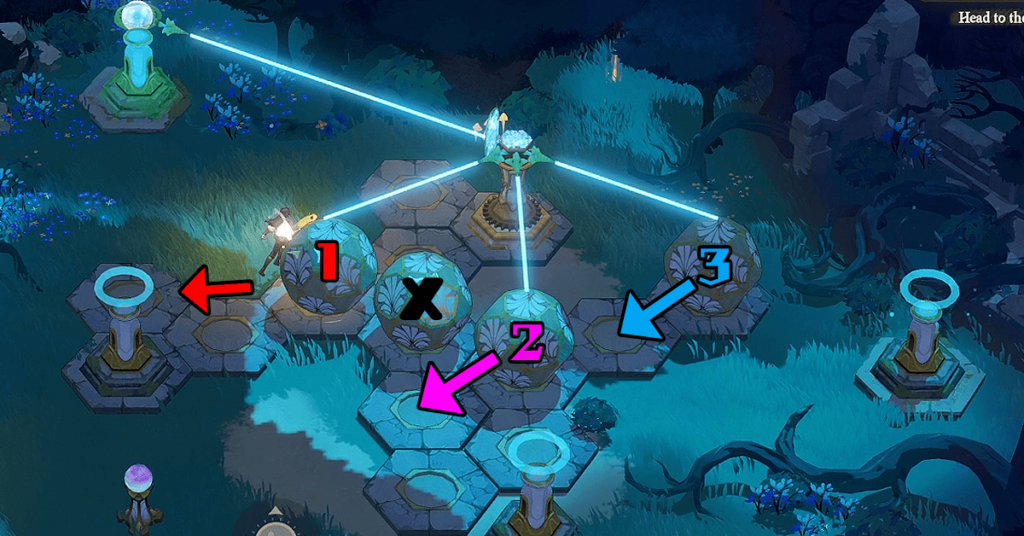
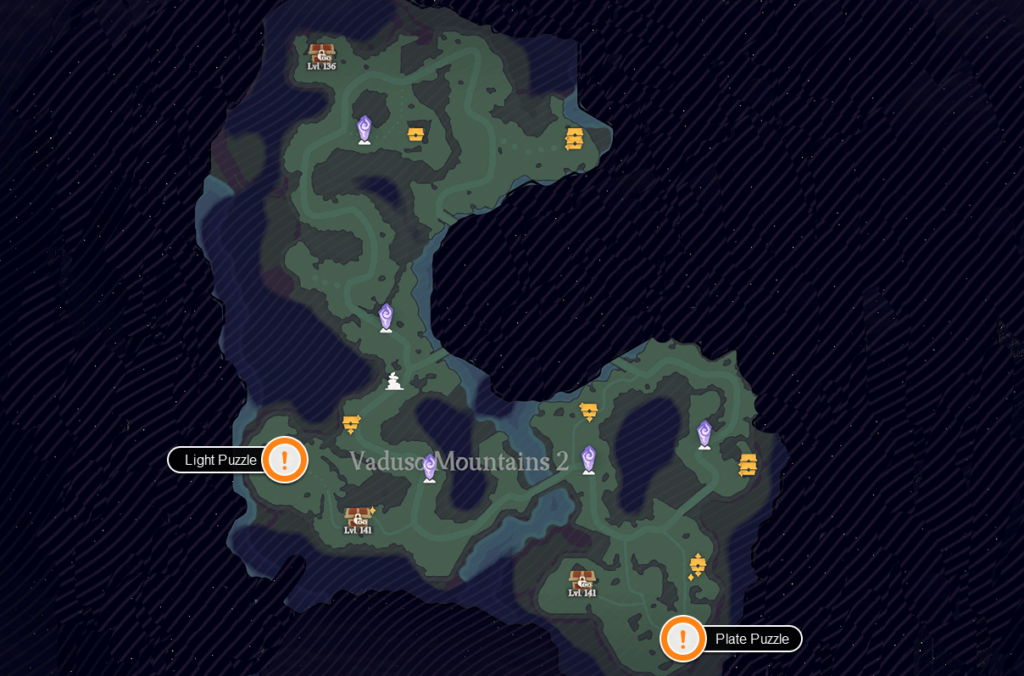
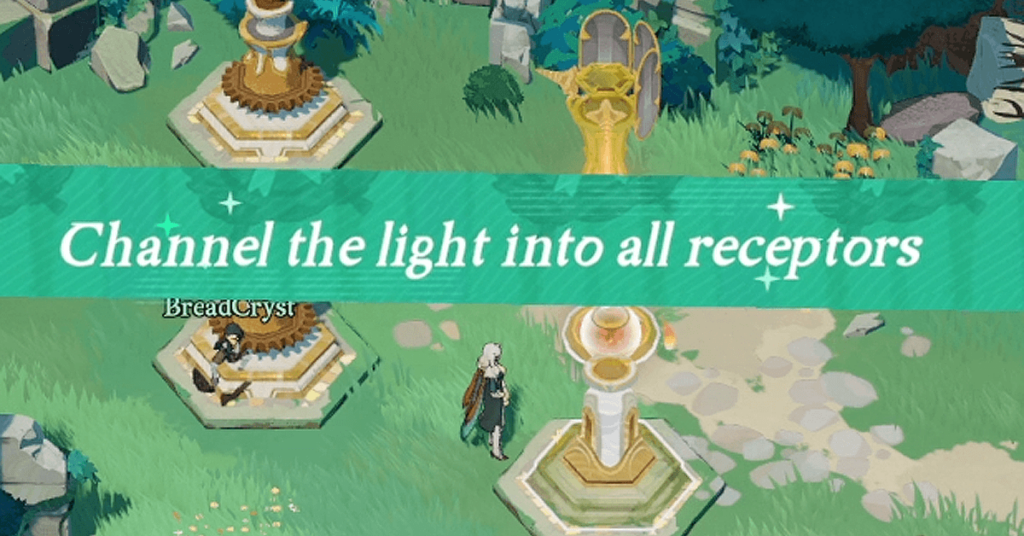
Light Puzzle
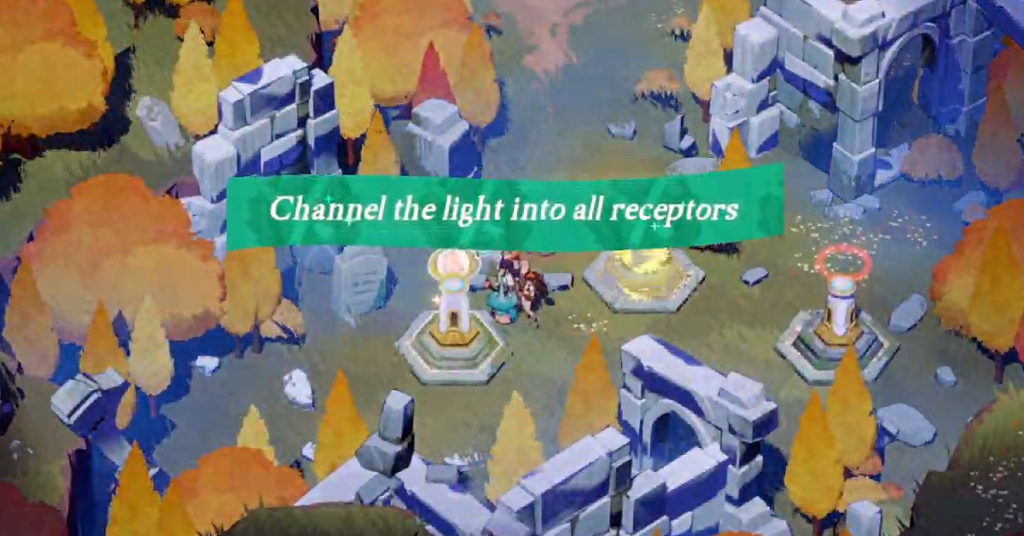
A Light Puzzle is located in the southwest of Golden Wheatshire 2. Once you have channeled the light into the receptors, a Treasure Chest will appear. Tap the ancient mechanism to activate the Light Puzzle.
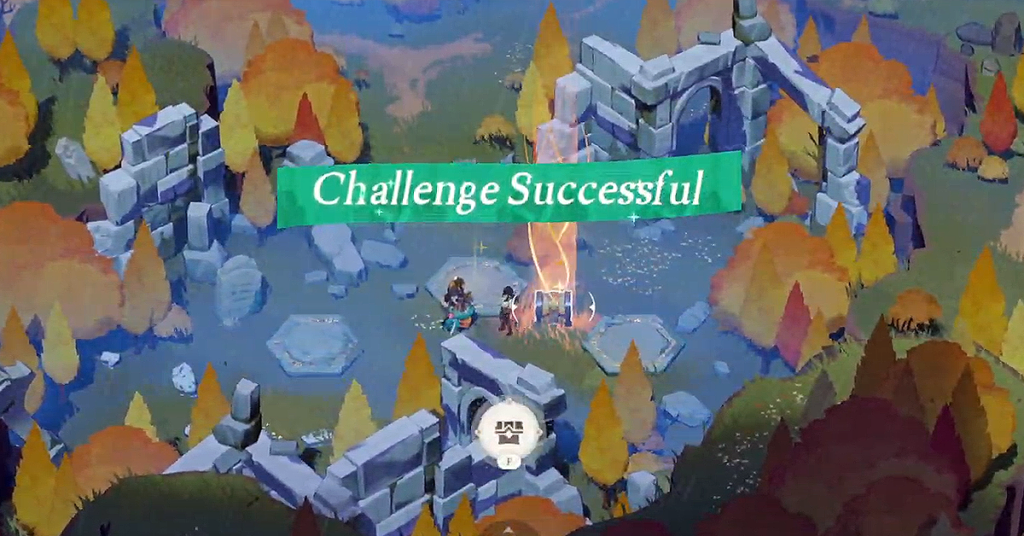
Connect the light with a receptor of the same color to activate it. The Light Puzzle is considered complete once all the receptors are activated.
Cliff-Bottom Cave
Golden Wheatshire 3

Pressure Plate Puzzle
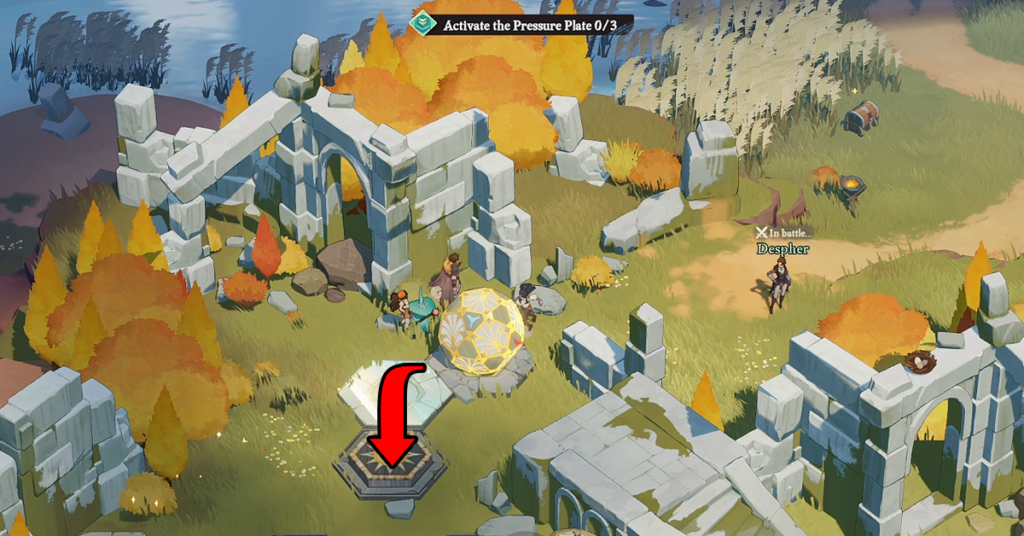
Pressure plates can be triggered by characters or heavy objects. In Golden Wheatshire 3, there is a pressure plate puzzle located on the northwest side where you have to activate three pressure plates.
Push the two rounded boulders onto the pressure plate, then stand on the third one to activate and unlock the hidden treasure chest.

Golden Wheatshire 4

Manor Tunnel
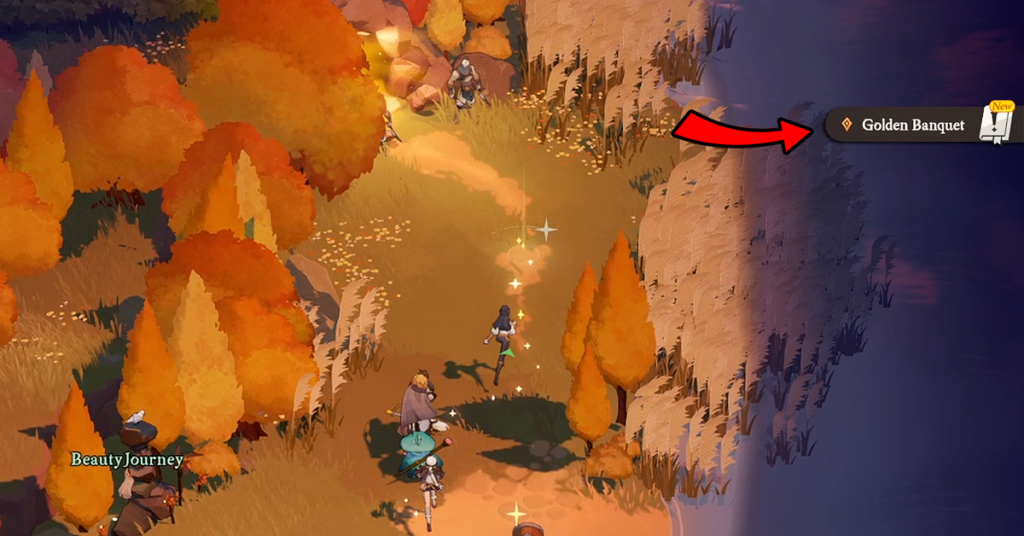
- Manor Tunnel will only become accessible after you follow through the Main Story Quest – Golden Banquet.

- Inside the Manor Tunnel, you will encounter a closed gate preventing you from entering further and grabbing the treasure chest. There's an encrypted note found southwest of the map. If you're playing during Early Access/Beta, the encrypted note has yet to be translated.

- To open the Gate, use the lever to arrange the panels accordingly: Top – Head, Middle – Hand, Bottom – Sword.
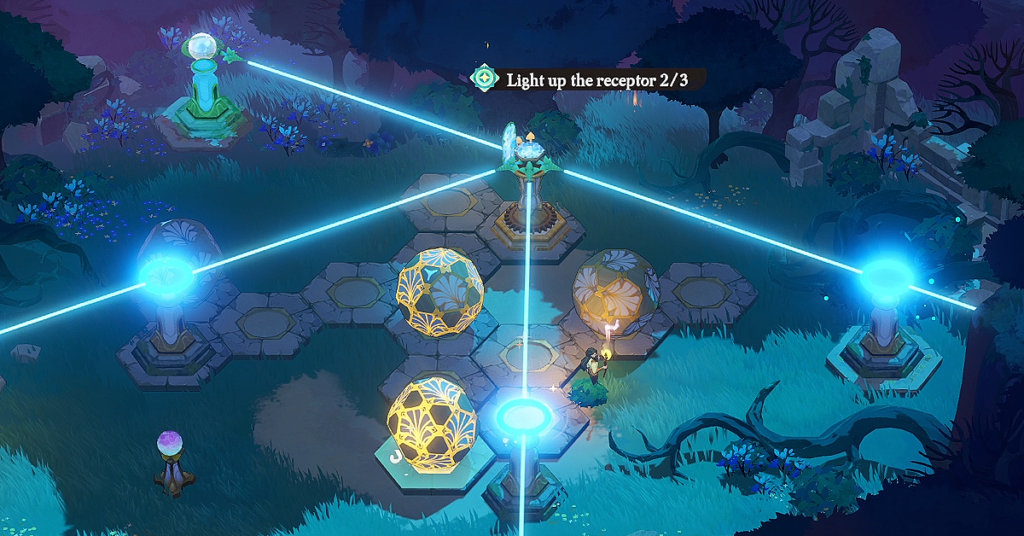
Light Puzzle

There are three receptors you must rotate and have the light connect to the other. Once you have successfully linked all receptors, the treasure chest will appear.

Puzzle Solution: North Receptor – Rotate 3 Times. East Receptor – Rotate 2 Times.
Golden Wheatshire 5
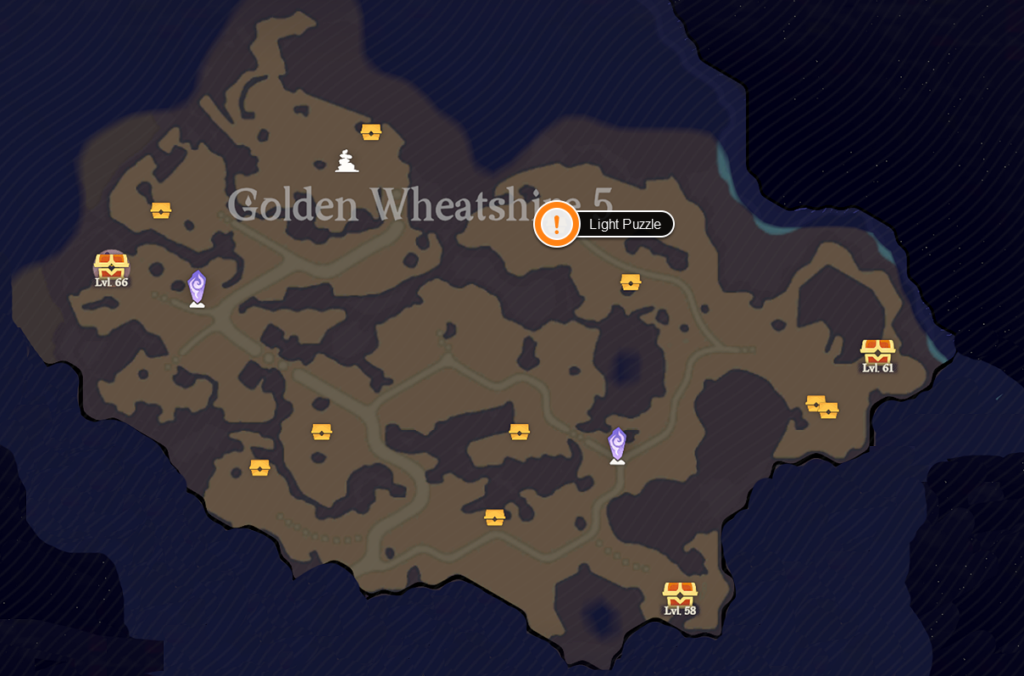
Light Puzzle

After activating the puzzle, five receptors will appear for you to connect. It will reveal a treasure chest once completed.
Connect all five receptors clockwise, beginning with the northeast receptor, then proceeding below it, and so forth.
Dark Forest 1
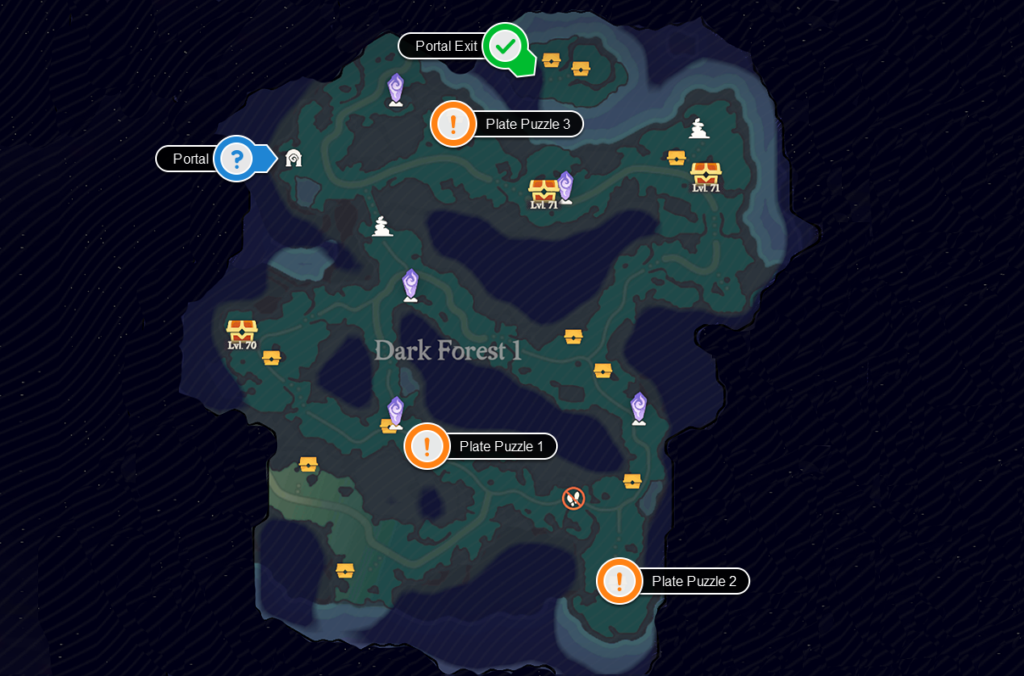
Plate Puzzle 1

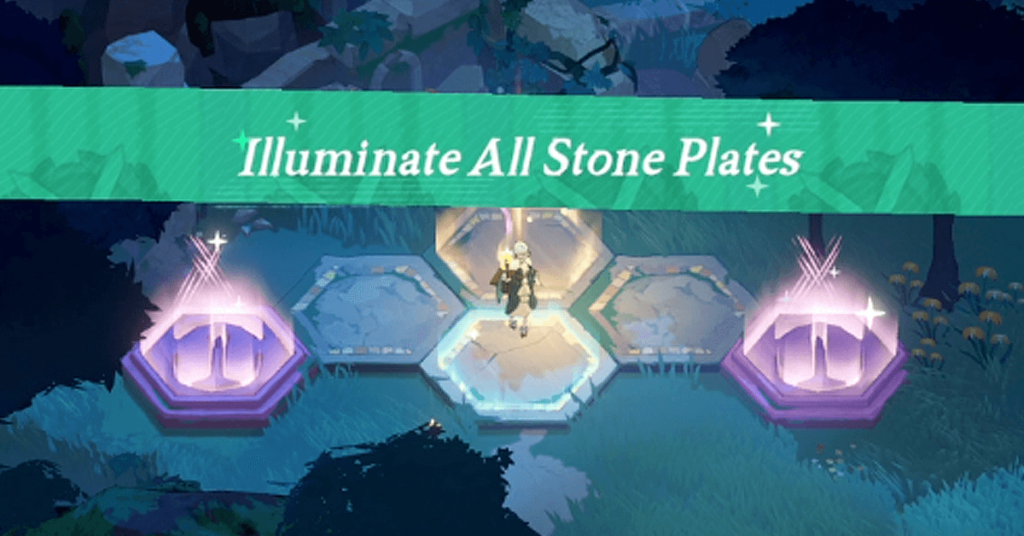
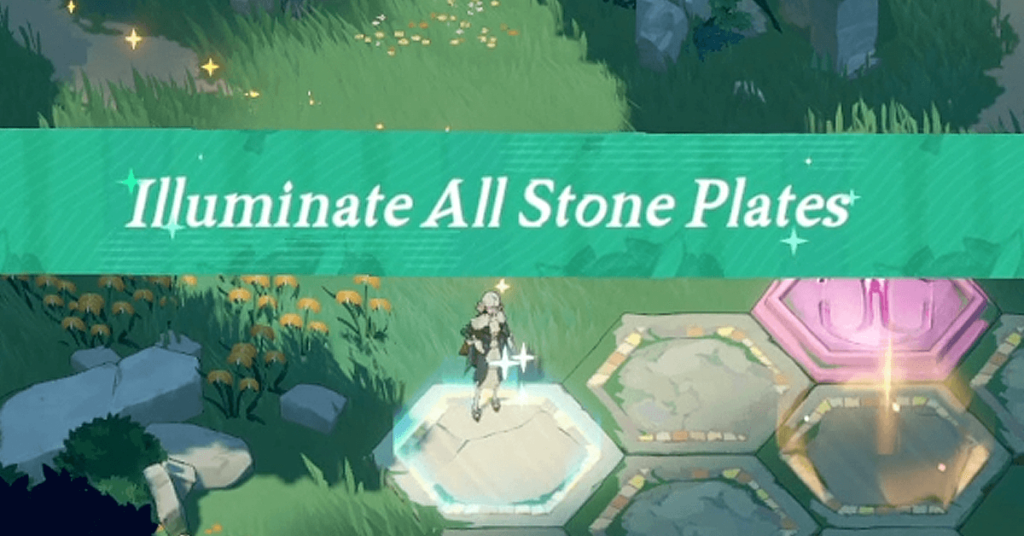
Step on the glowing plate to activate the puzzle. To solve it, illuminate all stone plates by stepping on each one until reaching the goal.
Upon reaching the goal, the puzzle will be completed, and a treasure chest will materialize for you to claim.
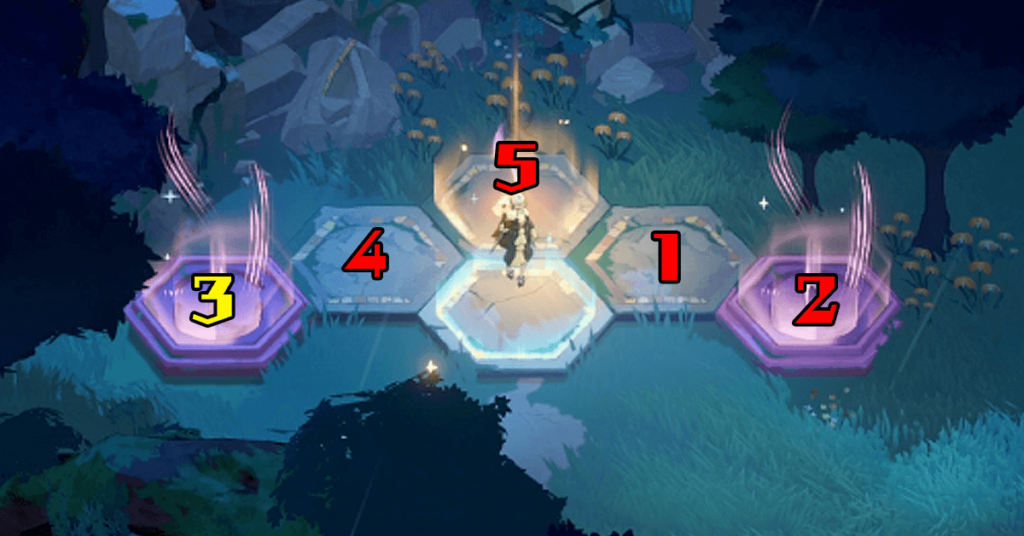
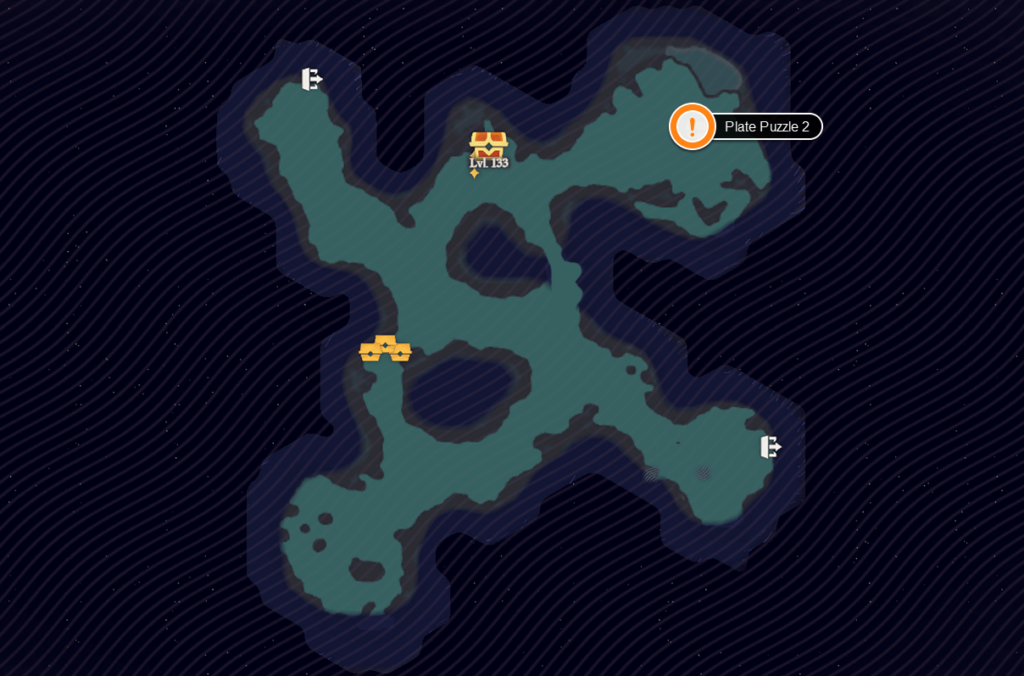
Plate Puzzle 2
Step onto the glowing stone plate to activate the Plate Puzzle. Solve the puzzle by stepping on and activating all the stone plates until you reach the end.
If you step on a stone plate twice, step off and on, or miss activating a plate after reaching the end, the Plate Puzzle will reset.
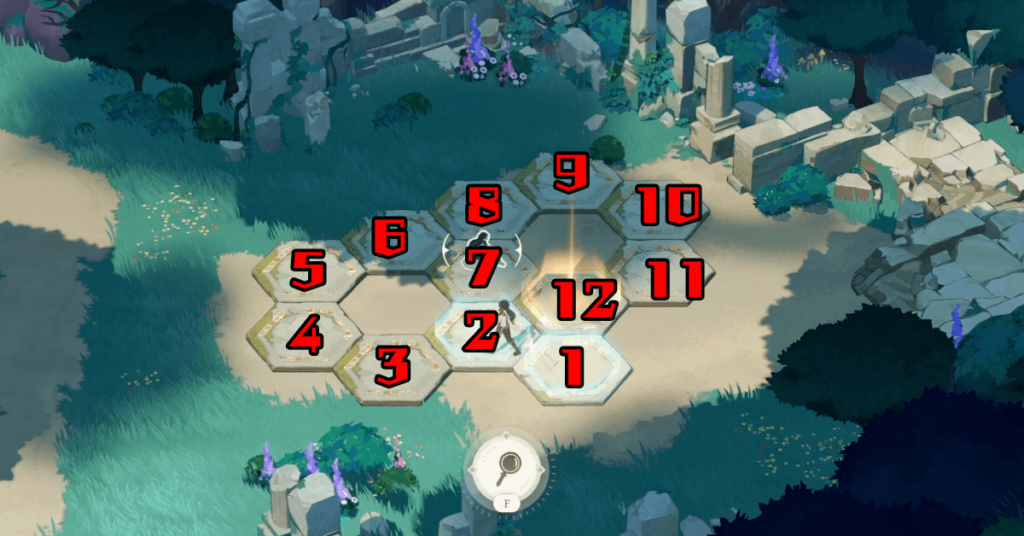
Plate Puzzle 3
This puzzle features more plates than the others, but it's relatively easy to solve. Begin from the south, then proceed around to the left and follow the inner path, as depicted in the image.

Be cautious of the plate at the north, as it is partly covered by grass, which can be easily missed.
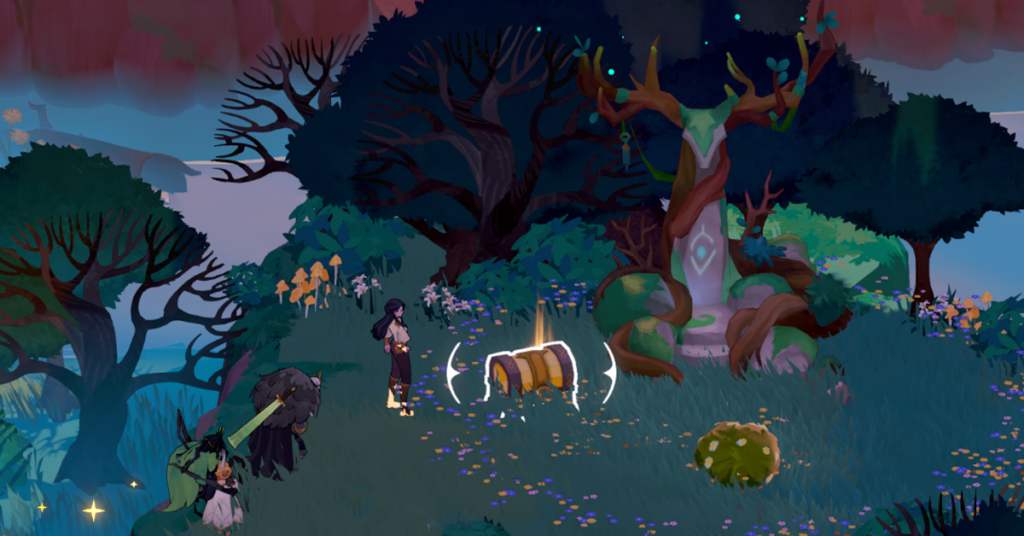
Mysteries of the Antlers I
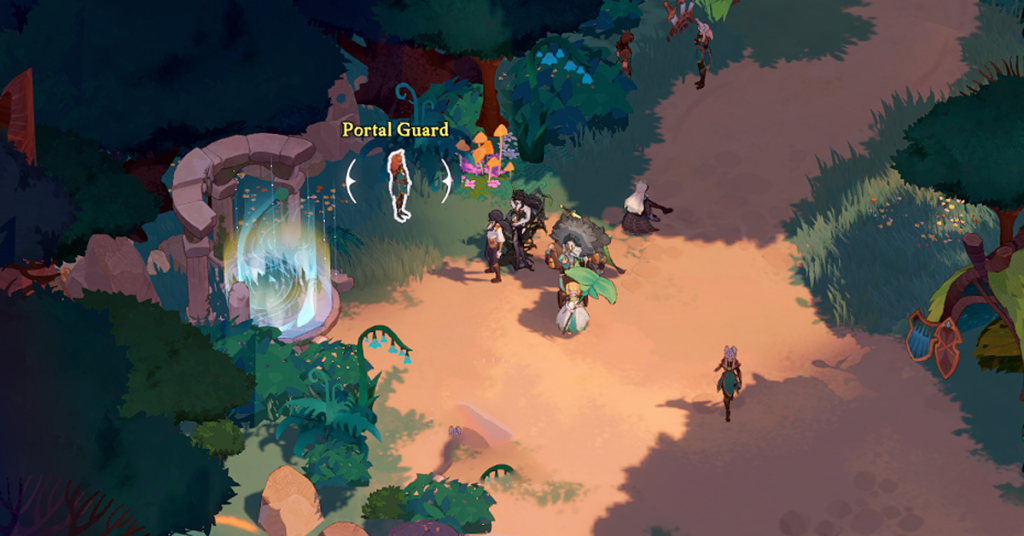
To access the island in the northern part of Dark Forest 1, talk to the Portal Guard northwest of Dark Forest 1 to start the sidequest and gain access to the Portal.
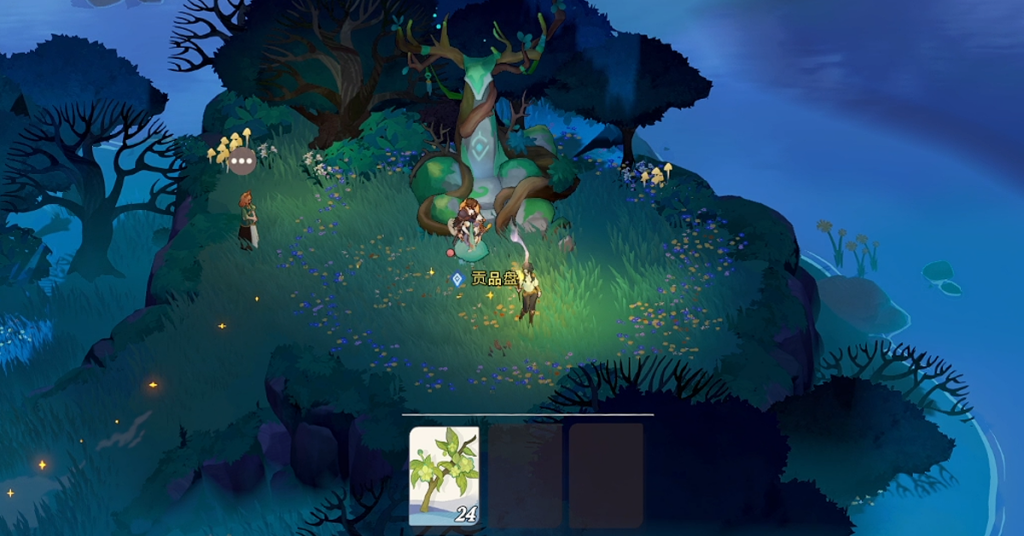
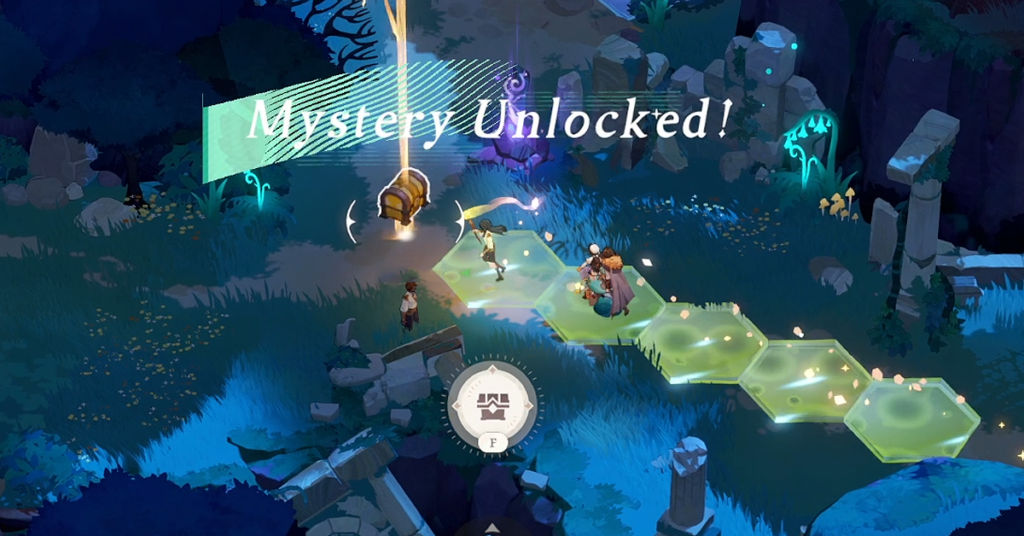
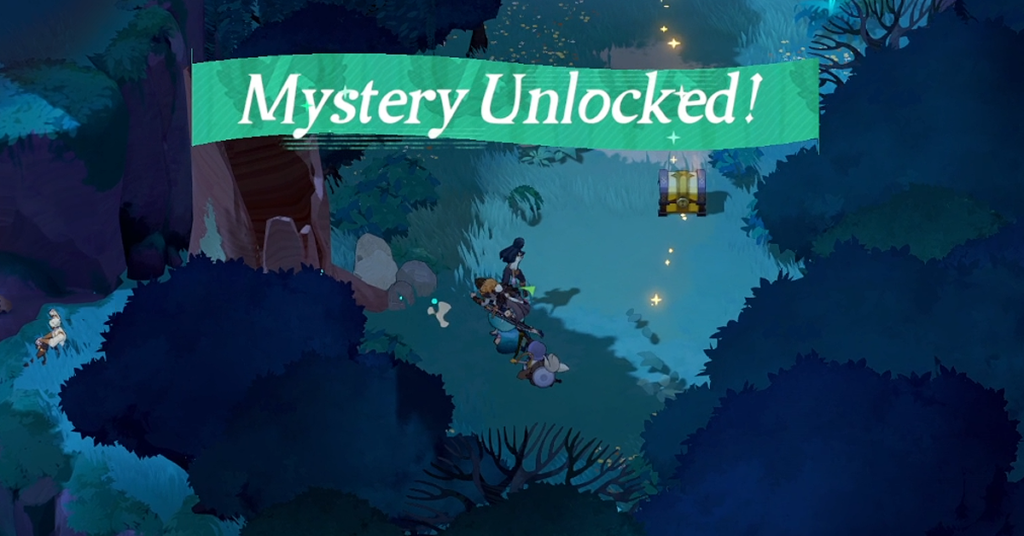
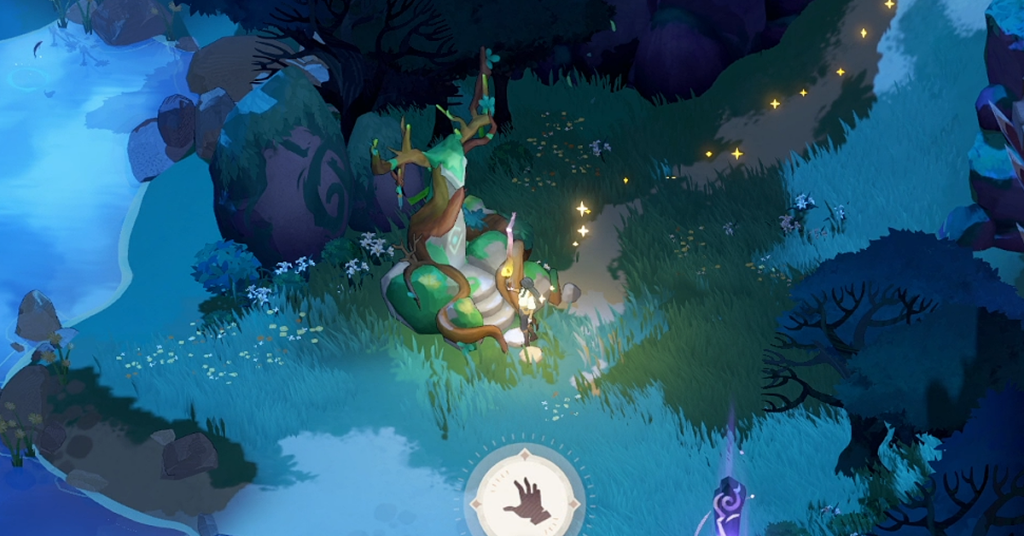
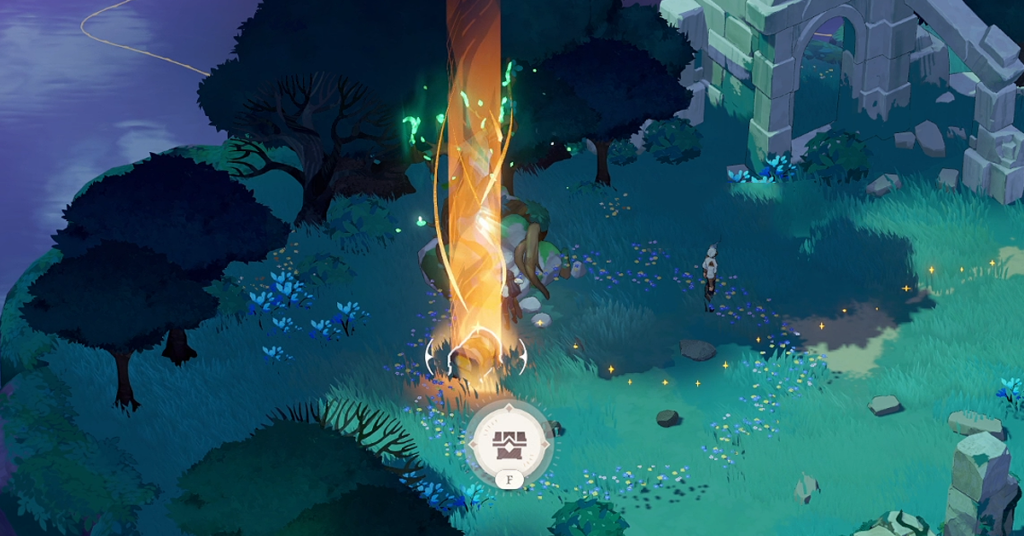
Once on the island, continue with the sidequest by talking to Villager Yolanda, then activate the Deer Spirit altar by planting a Hexaflower.
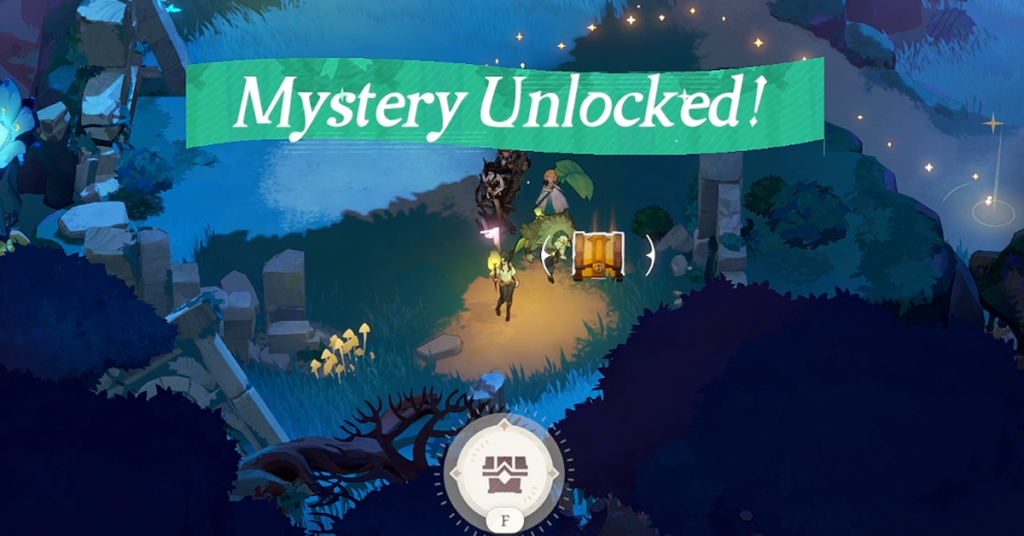
After planting the Hexaflower, interact with the Deer Spirit altar to activate it and reveal the treasure chest.
Dark Forest 2
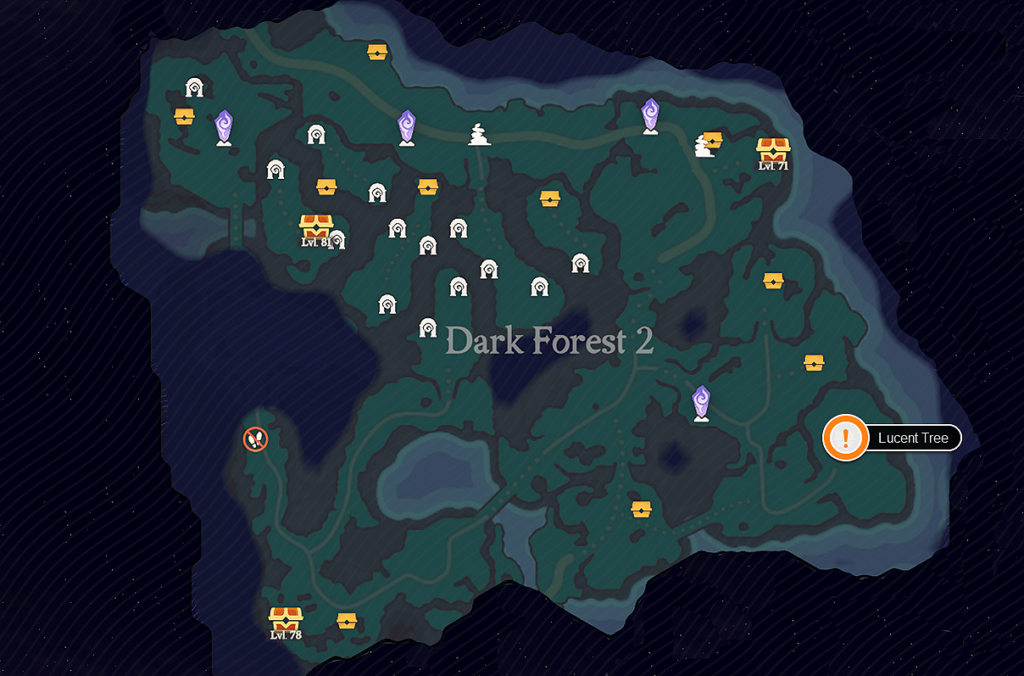
Mysteries of the Antlers II

Interact with the Deer Spirit altar found southwest of the Dark Forest 2 to receive a riddle.
“On the shimmering shores where life commenced… On the high cliffs where the crisp wind was sensed…”
After receiving the hint, interact with the altar again to obtain the treasure chest.
Dark Forest 3

The inaccessable island becomes available after you have activated all Deer Spirit altar (Mysteries of the Antlers).
Light Puzzle

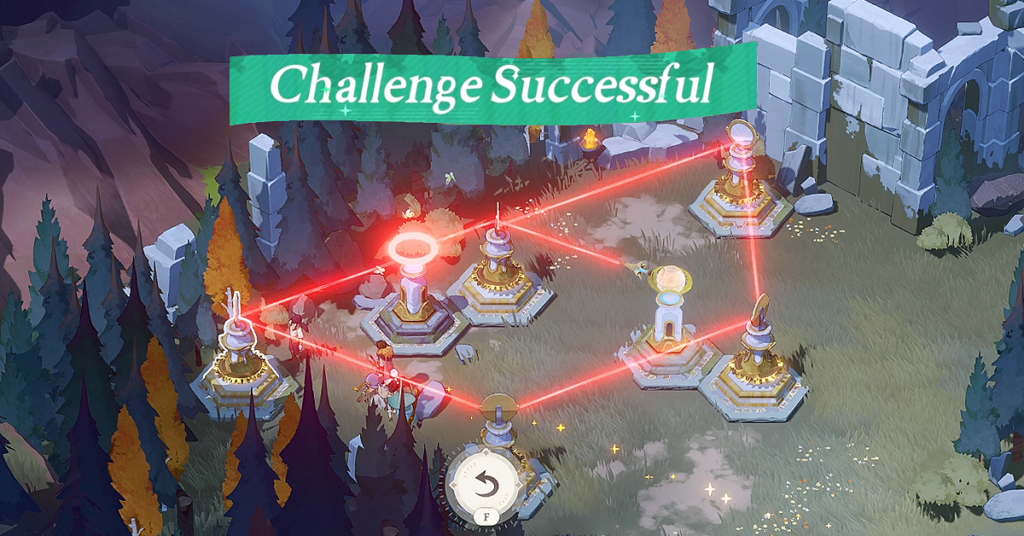
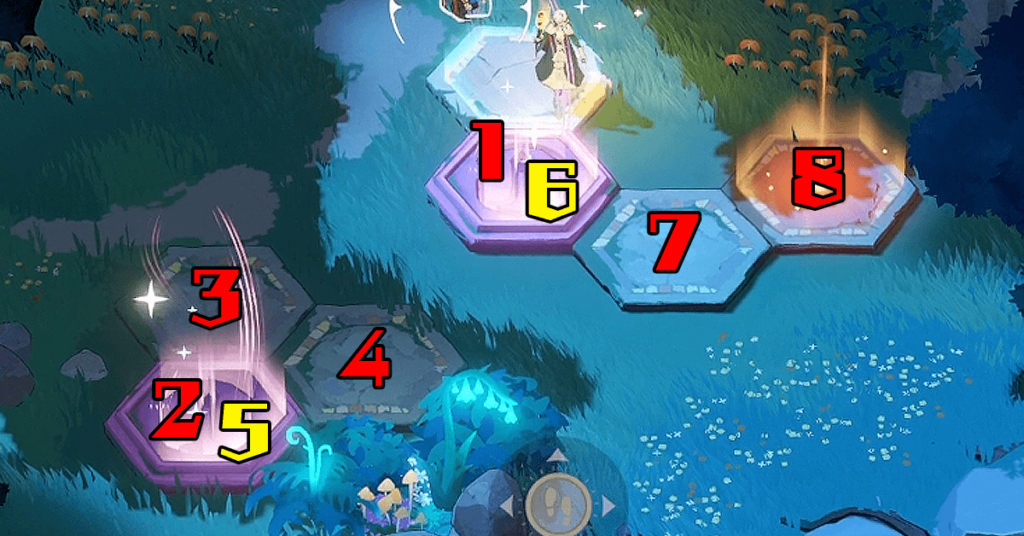
Dark Forest 3's Light Puzzle is a combination with the pressure plate. You must push the rounded boulder all the way to the east and then activate and connect the light receptors.
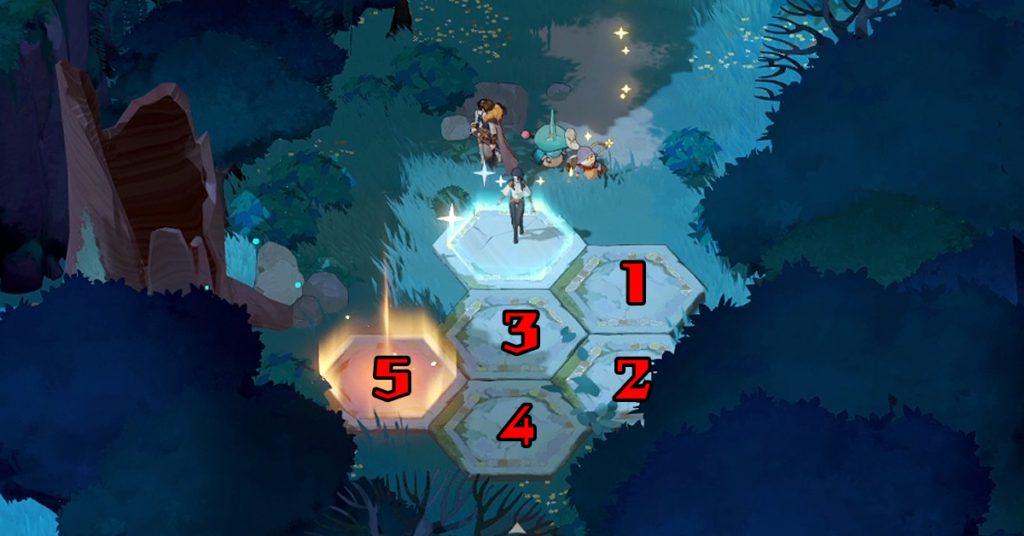
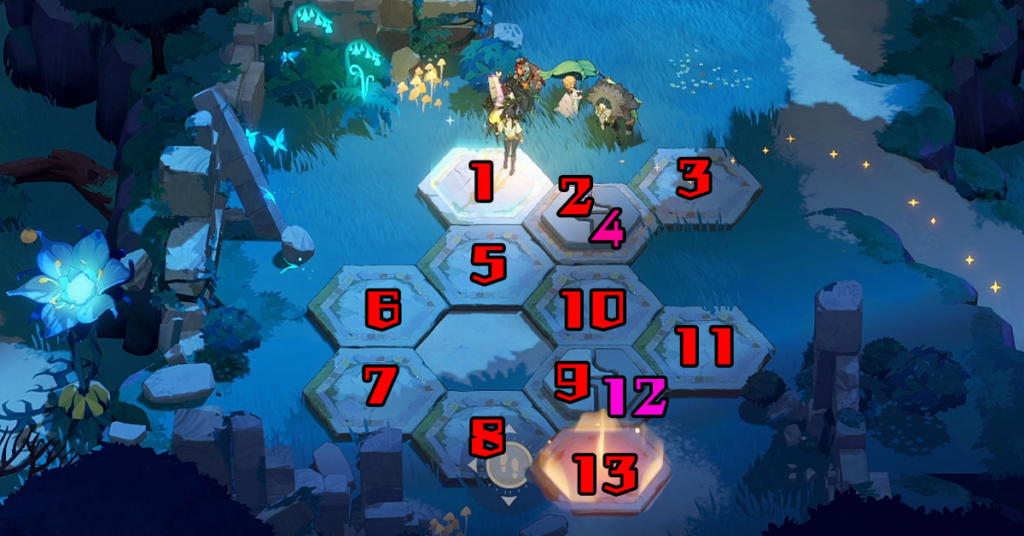
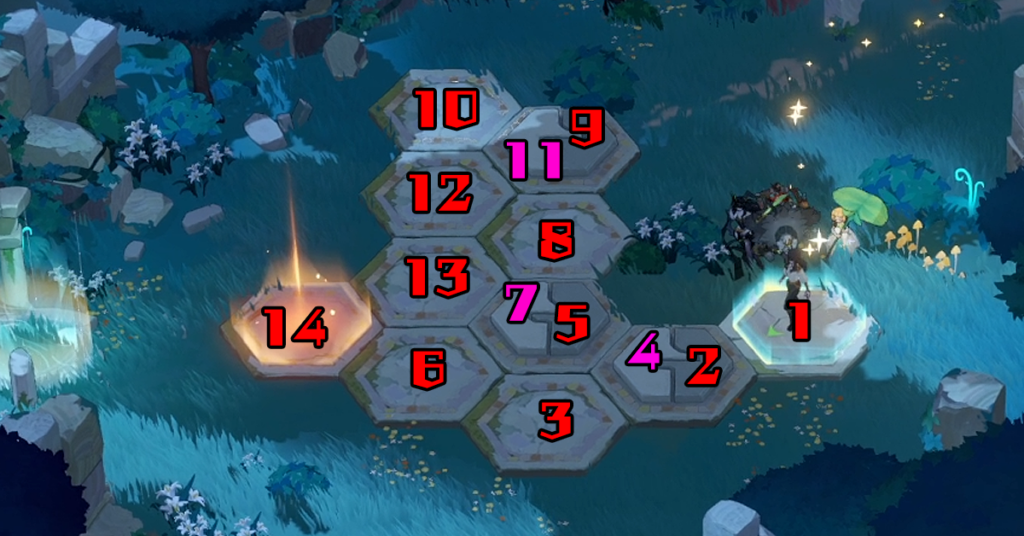
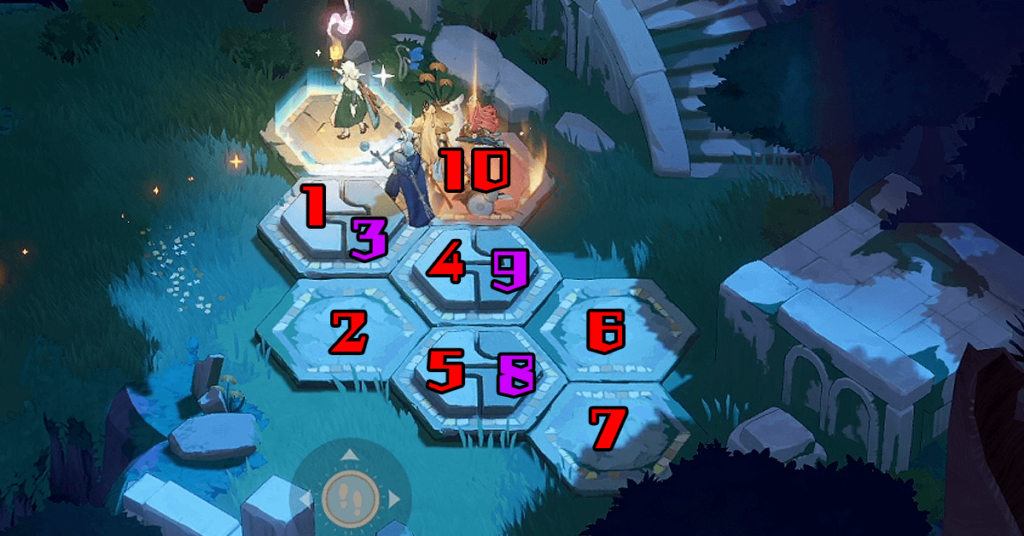
Plate Puzzle
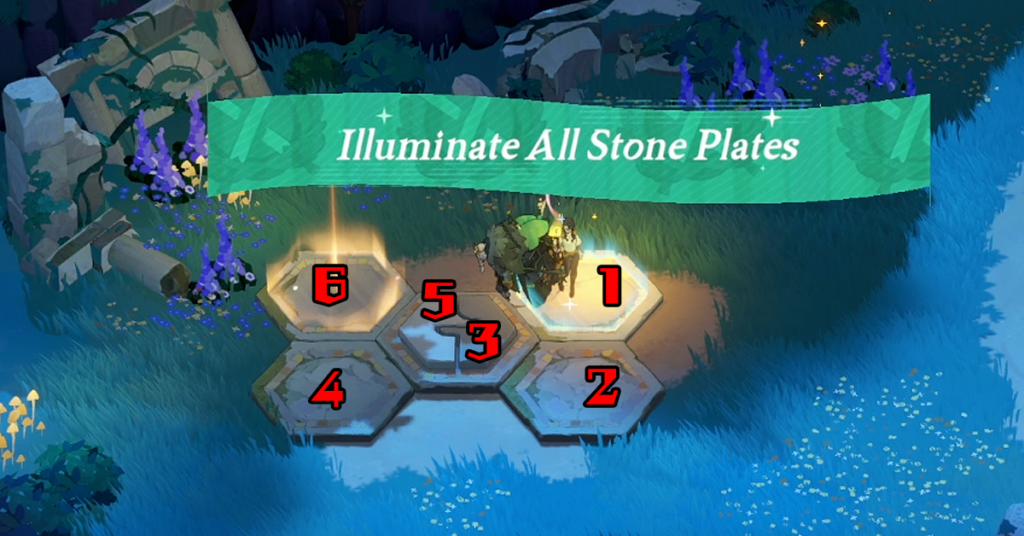
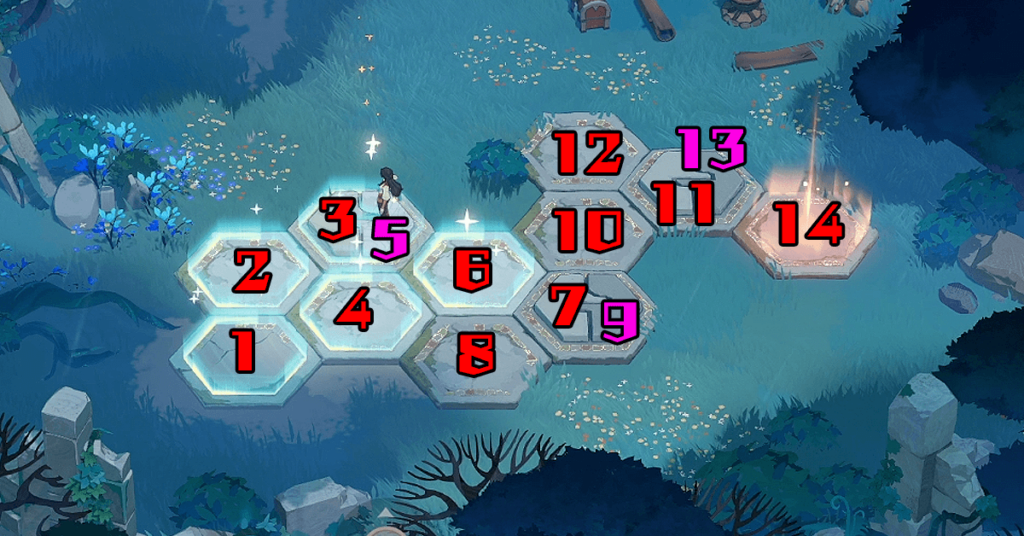
It's the same as the other Plate Puzzle but with an extra step. Notice the two parts in the middle? It means you must step on that plate twice.

Follow the number on the provided image above to solve the mystery.
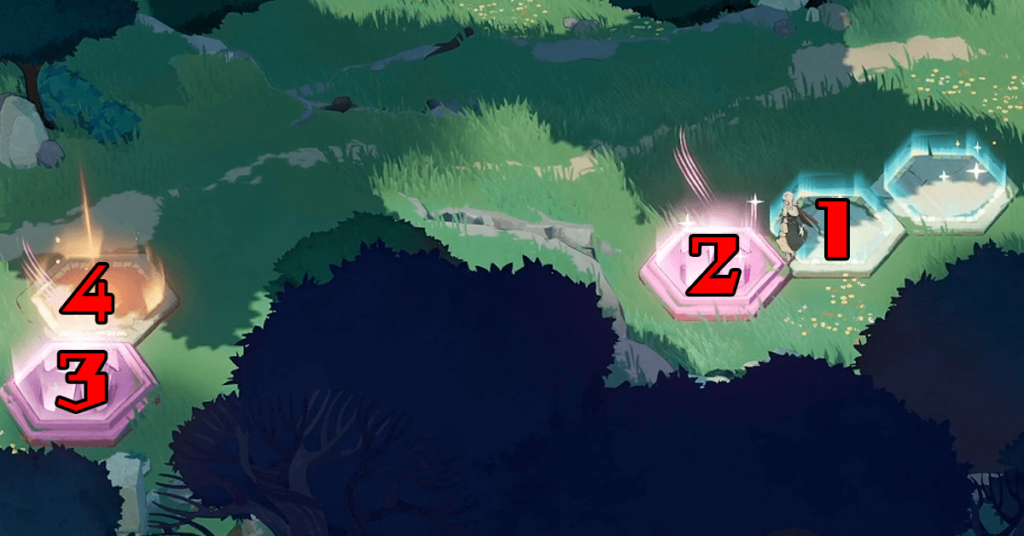
Plate Puzzle 2
This plate puzzle is easier. Follow the sequence provided in the image to complete the puzzle and receive your reward.
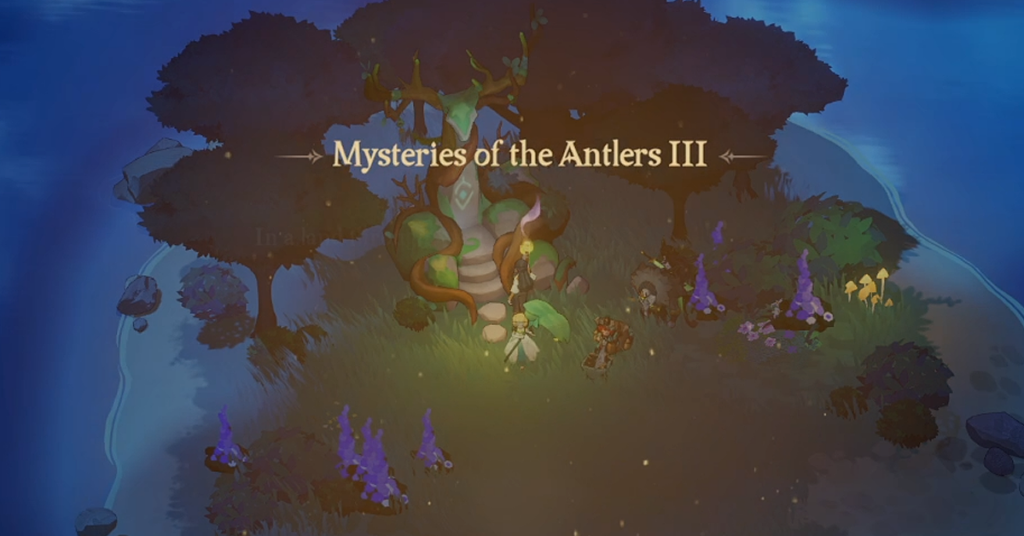
Mysteries of the Antlers III
The Deer Spirit altar in Dark Forest 3 can be accessed through the Portal on the eastern side, right by the shore. Once interacted, you will receive a riddle.

“In a land through the shining waters of Lunnos Lake… On a shore, protecting a treasure no one could take…”
Interact with the Deer Spirit altar again to obtain a treasure chest.
Dark Forest 4

Plate Puzzle 1
To solve the puzzle, illuminate all plates by walking over them. If you step out of the plates, the puzzle will restart. Follow the sequence according to the image provided.
Remember, the two-colored plate indicates that you must step on it twice to activate it.
Plate Puzzle 2
The second plate puzzle may look intimidating and may encounter problems on the first try; keep in mind you need to step on the two-colored plate twice before progressing.

Follow the order provided in the photo until you reach the final plate. As a reward, you will receive a treasure chest.
Light Puzzle
Interact with the receptor at the north to activate the Light Puzzle. A new receptor will appear with two light beams attached to it.
Turn the light receptor in the middle once to connect it with the two available receptors to complete the puzzle.
Mysteries of the Antlers IV
Interact with the Deer Spirit altar to activate it and receive the next hint. Then, interact again to receive the treasure chest.
“On the shimmering shores where life began… A lush land where the deer thrived with no man…”
Dark Forest 5

Plate Puzzle
There are more double plates for Dark Forest 5, which some may find confusing. To solve the puzzle, follow the sequence provided in the image.
Mysteries of the Antler V
To proceed, Speak to Atalanta near the altar. After that, interact with the Deer Spirit altar to activate it and receive the next hint and the treasure chest.
“On the cliffs where sparks fly and glow… Seeds of fortune do fly and blow…”

Dark Forest 6
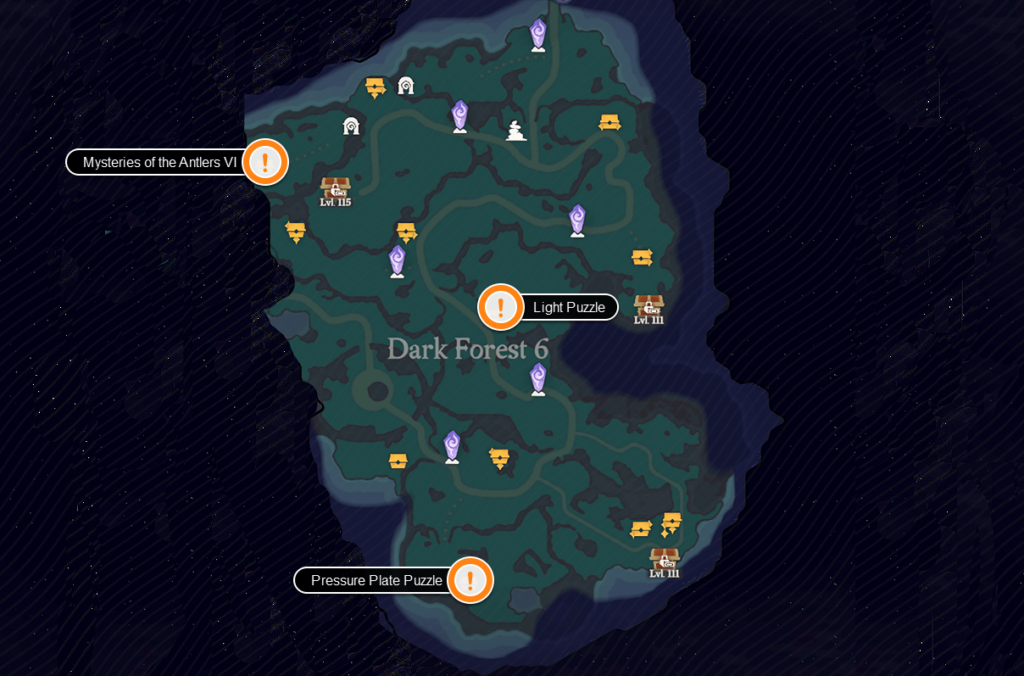
Pressure Plate Puzzle
This puzzle has two sections. First, push the rounded boulder toward the pressure plate on the west side, then stand on the second plate indicated in a circle.
After standing on the plate, this activates the second section. To solve this puzzle, push the first rounded boulder to the plate on the south, then move the second rounded boulder to the plate on the west.
After positioning the boulders, go back to the pressure plate in the initial section. Step onto it, and the puzzle will resolve, unveiling a treasure chest for you to claim.
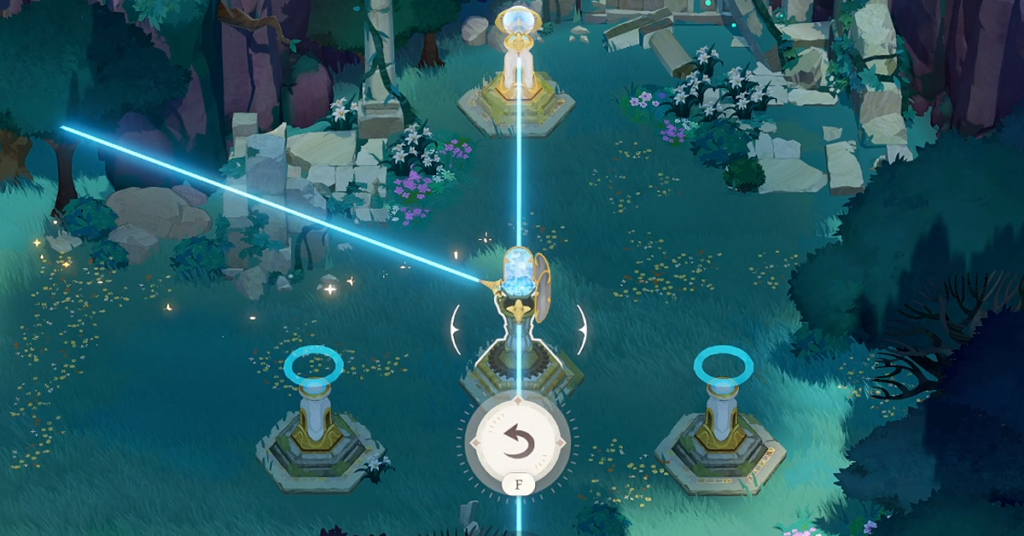
Light Puzzle
The goal of this puzzle is to move the rounded boulders from blocking the beam of light.
Once all light reaches the receptors, the puzzle prompts its completion and reveals a treasure chest as a reward.
Mysteries of the Antlers VI
To continue the Mysteries of the Antlers chain quest, talk to Atalanta first. She is located at the altar's location. After the first interaction, talk to her again for a cutscene.
After the cutscene, approach and interact with the Deer Spirit altar to receive the treasure chest.

Dark Forest 7
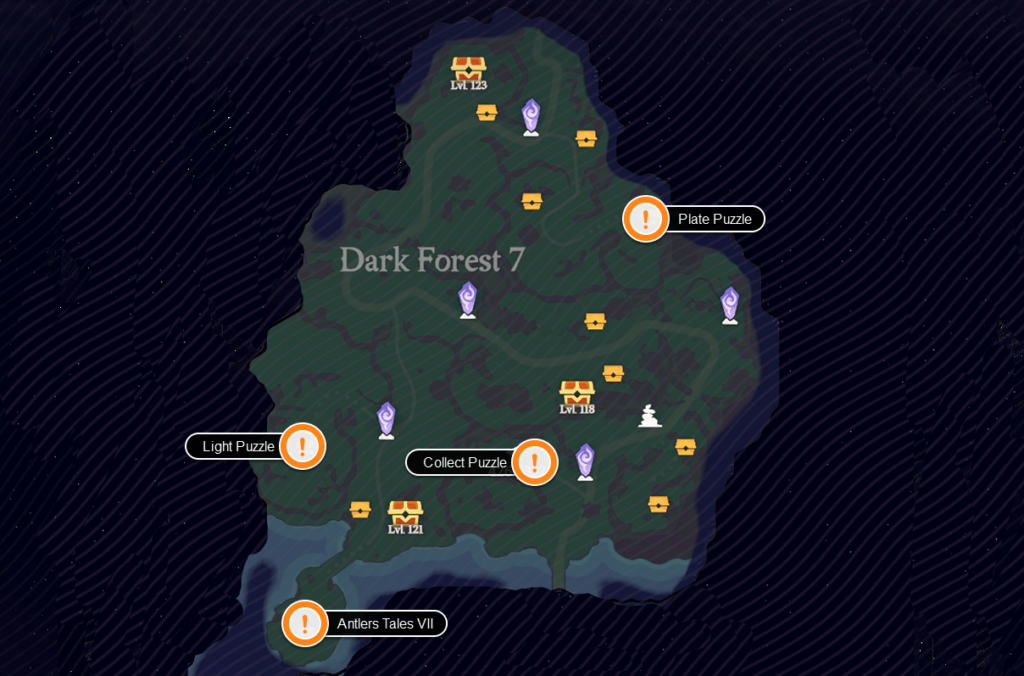
Collect Puzzle
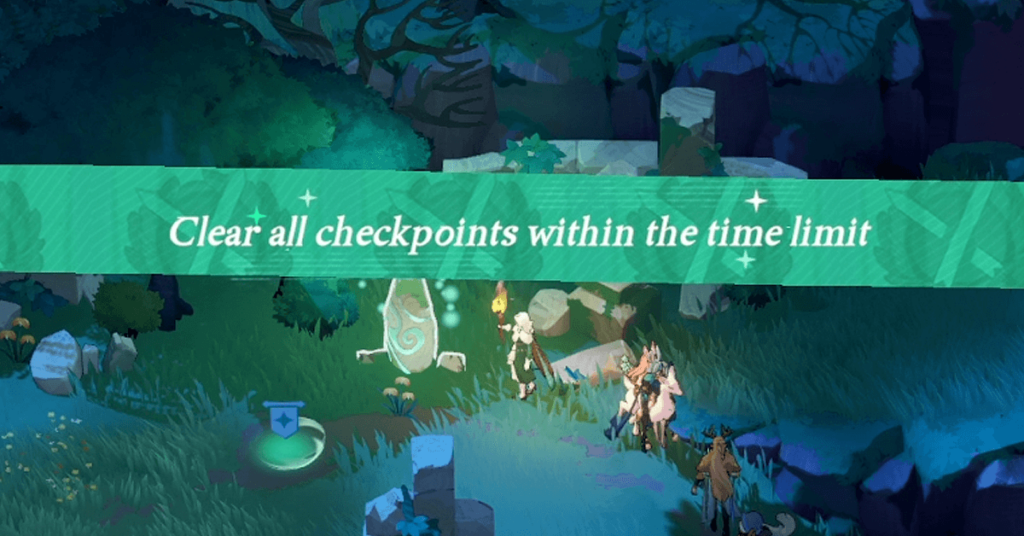
A new puzzle is introduced in the Dark Forest 7, and completing it is very simple. Collect all checkpoint flags within the time limit.

You have 30 seconds to gather all the checkpoint flags in the vicinity of the puzzle area. If you fail to collect them all, the puzzle will reset.

Collecting all checkpoint flags completes the puzzle. Granting you a treasure chest.
Mysteries of the Antlers VII

Antlers VII (403;314) is the final statue of the Mysteries of the Antlers to activate in order to unlock the closed-off island in Dark Forest 3.
Interact with the statue to activate and collect the treasure chest. Then head to Dark Forest 3 to start the last questline for Deer Spirit.
Light Puzzle
The Light Puzzle in Dark Forest 7 features multiple lights. Rotate the receptor according to the numbers shown in the image below.

To complete the puzzle, turn the first receptor three times, the second receptor once, and finally, the third receptor twice.
Plate Puzzle
To solve this puzzle, illuminate all the plates to complete it. However, note that some plates require stepping on them twice. Follow the guide shown in the image below.
A treasure chest reward will appear once you have successfully lit up all plates.
Vaduso Mountains 1
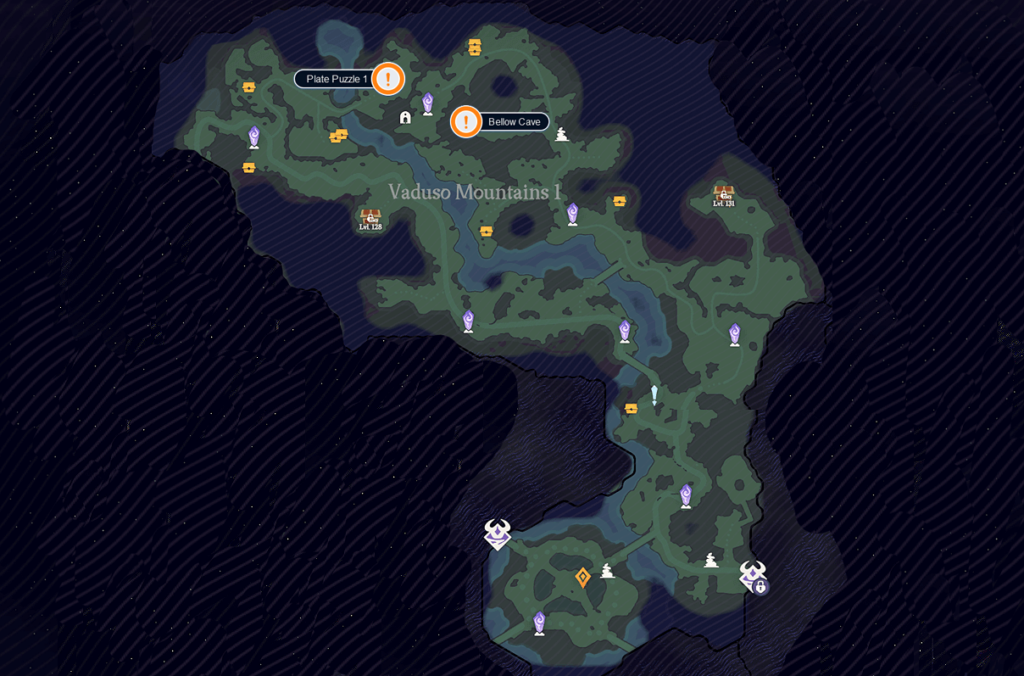
Plate Puzzle 1
Vaduso Mountains 1 introduces a new addition to the plate light puzzle. The purple light indicates a teleportation plate. Stepping on it transports you to the other purple light plate.
Once you reach plate two, you will be transported to plate three and then continue to four and five to complete the puzzle.
Bellow Cave
Bellow Cave: Plate Puzzle 2
This is another Tele-plate. Follow the sequence provided in the image. When the puzzle is completed, a treasure chest will appear.
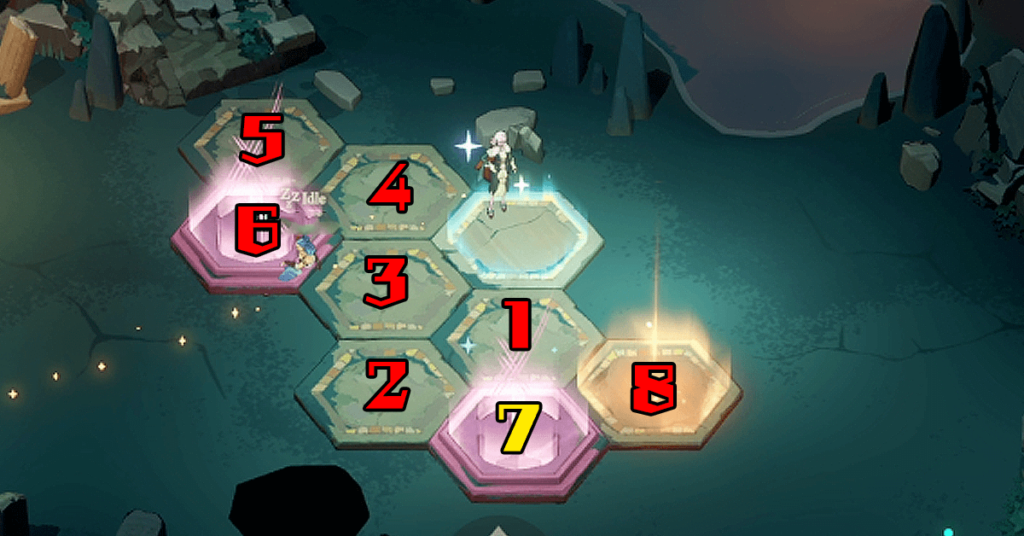
Vaduso Mountains 2
Light Puzzle
After activating the Light Puzzle, rotate the receptors to connect the light beam with the other receptors. Once completed, a treasure chest will appear.

To solve the puzzle, turn the first receptor four times, the second receptor four times, and then the last receptor one time.
Plate Puzzle
The goal is to illuminate all the plates. You can only step on regular plates once, while the purple plates teleport you to the other purple plate. Stepping out or stepping twice on the plates resets the puzzle.
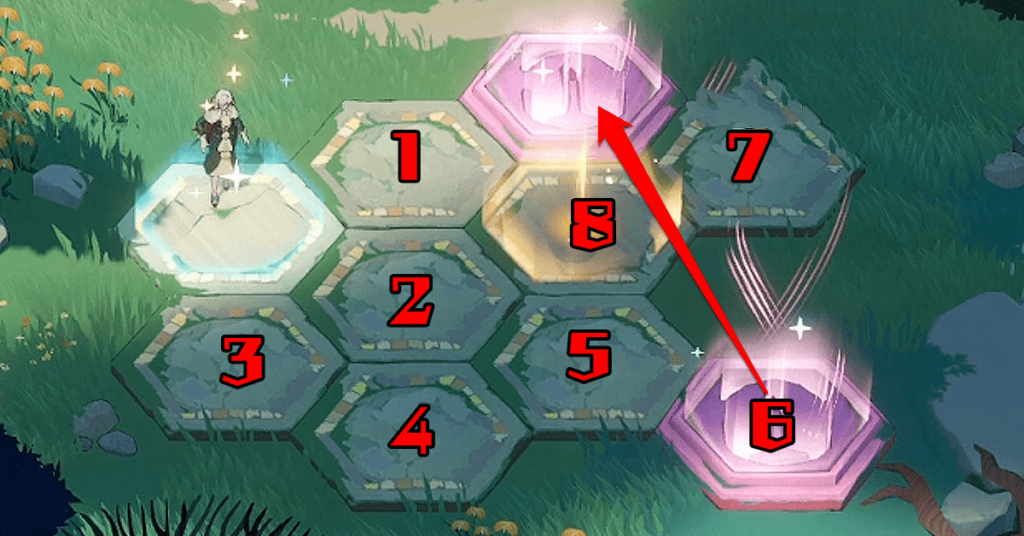
To complete the puzzle, follow the sequence provided in the image. Once the puzzle is solved, a treasure chest will appear.
Vaduso Mountains 3
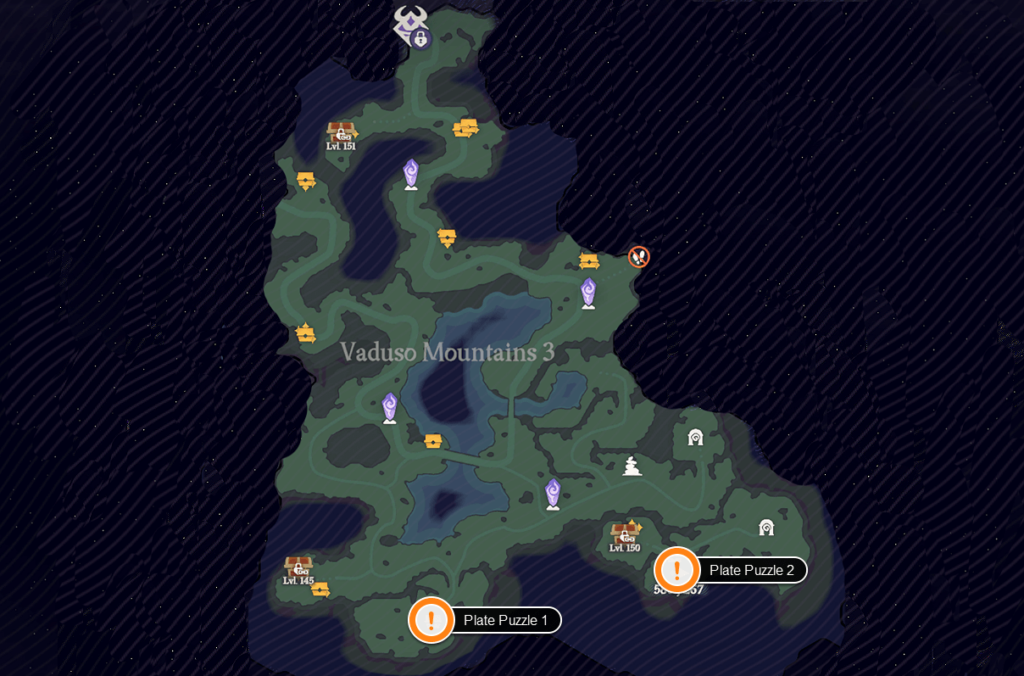
Plate Puzzle 1
Light all the plates by stepping on them. Follow the sequence in the image to complete the puzzle and receive the reward.
Plate Puzzle 2
Light all the plates by stepping on them. This one is simple: walk over every platform to complete the puzzle.
Vaduso Mountains 4
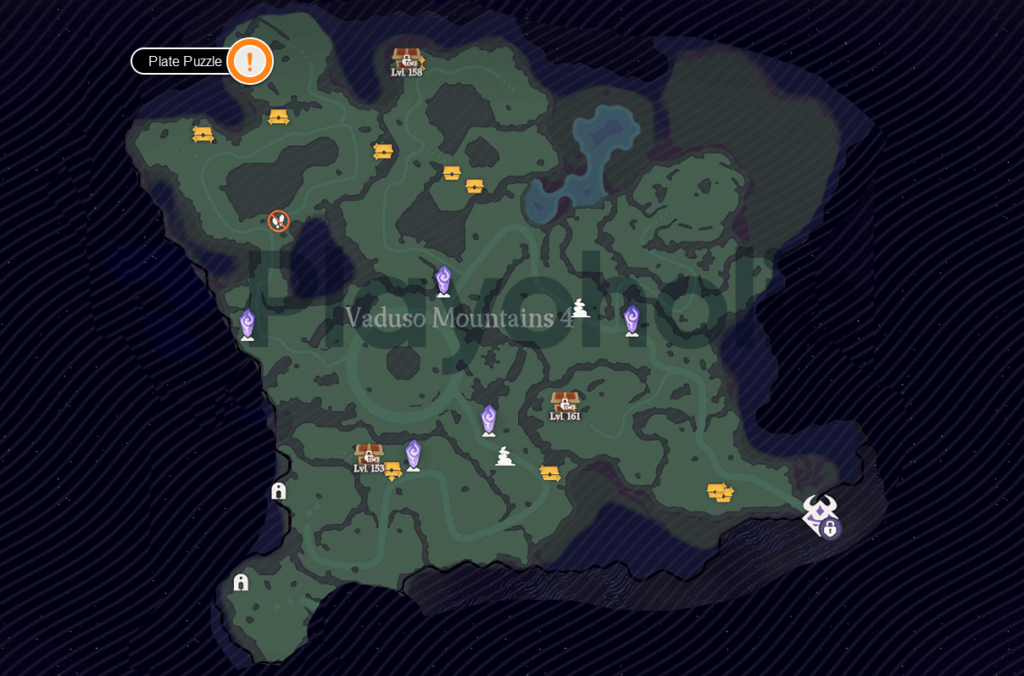
Shadow Cave
Plate Puzzle
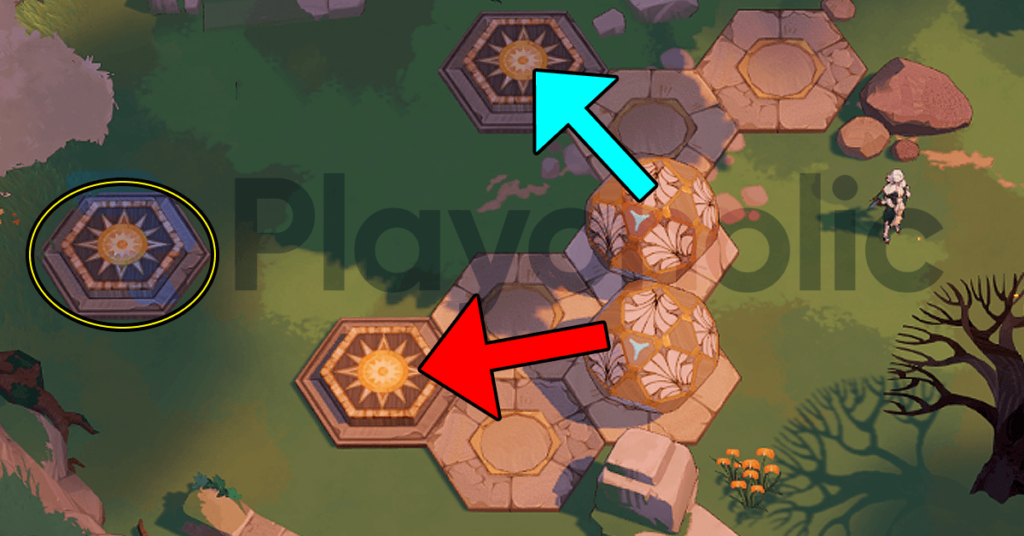
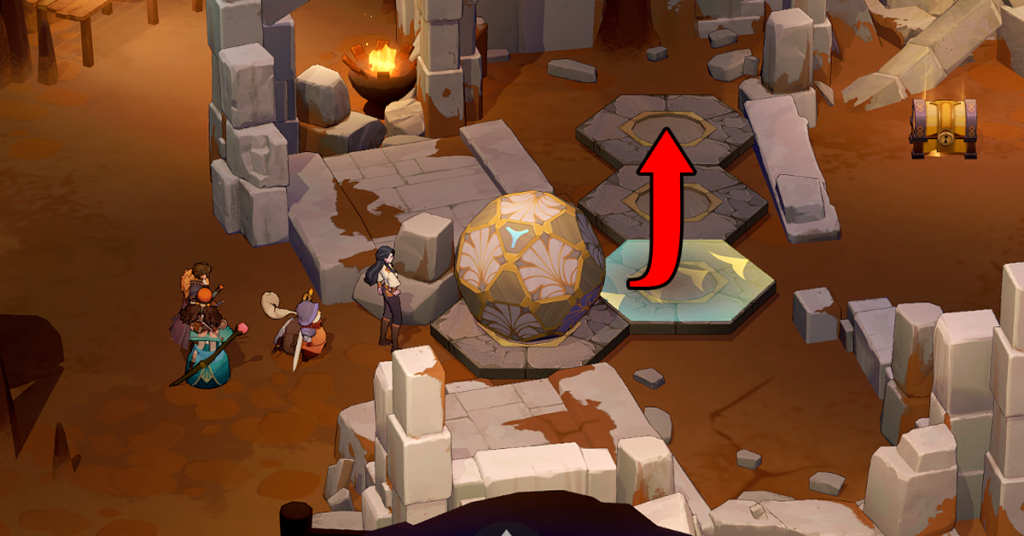
Roll the rounded boulder towards the pressure plate marked with an arrow. Once they're in place, stand on the plate on the left, marked with a yellow circle in the photo.
Vaduso Mountains 5
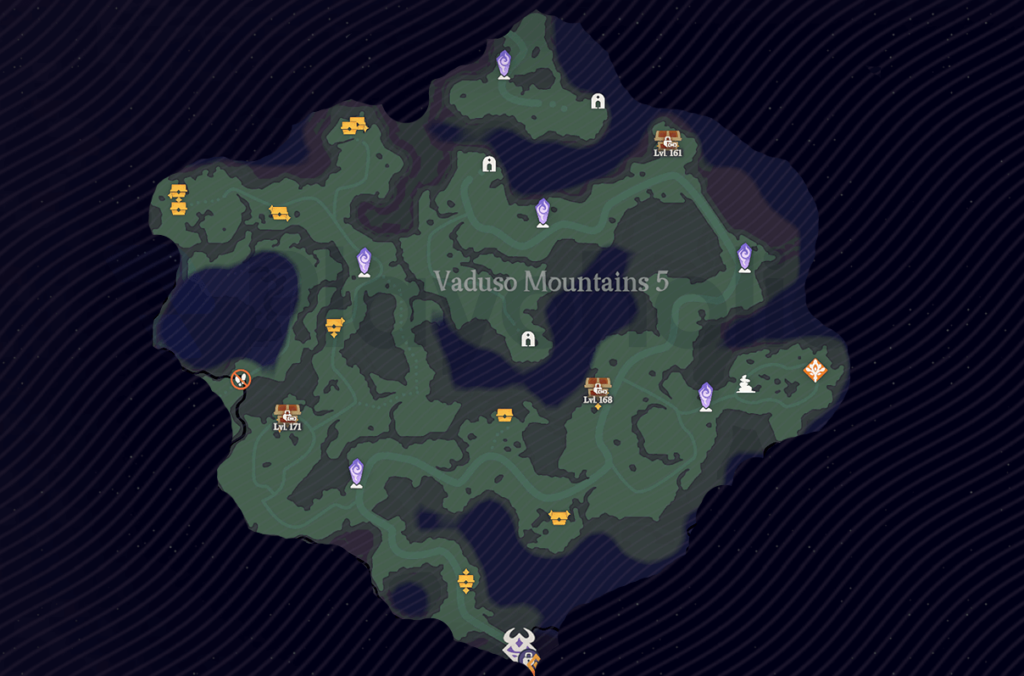
Dusty Cave
Dusty Cave: Plate Puzzle
Move the rounded boulders to the designated plates as shown in the image, then step onto the final plate to solve the puzzle and unlock the gate.
Dusty Cave: Light Puzzle
After activating the puzzle, push the rounded boulders, then rotate the light receptors as shown in the image. A treasure chest will appear after completion.
AFK Journey – Types of Treasure Chest
Regular Treasure
In AFK Journey, there are two types of treasure chests. The first type is the Regular Treasure, which come in three sizes: small, medium, and large. These are scattered throughout the map, and some can be obtained after clearing puzzles.
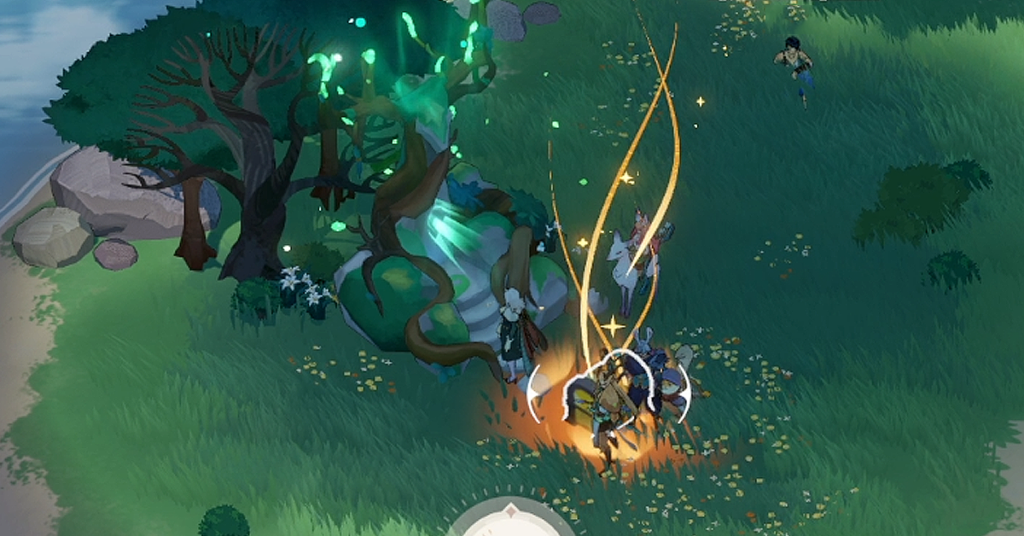
Crimson Treasure
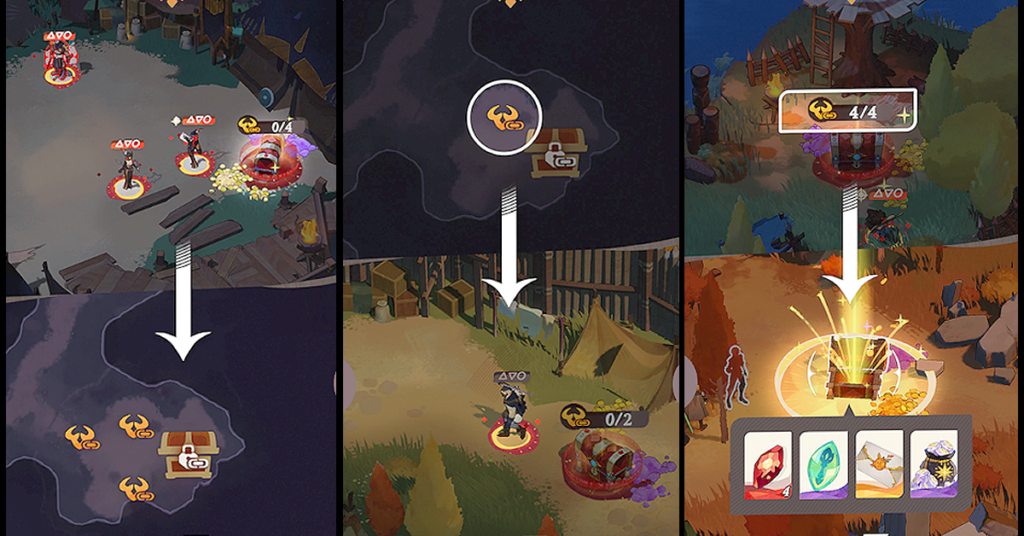
The second type is the Crimson Treasure. These hold valuable items and are often guarded by Treasure Keepers. Treasure Keepers bear a distinctive mark, which is also displayed on your mini-map. The count above the chest indicates the remaining/total number of Treasure Keepers. You can only claim the treasure after defeating all the keepers.