


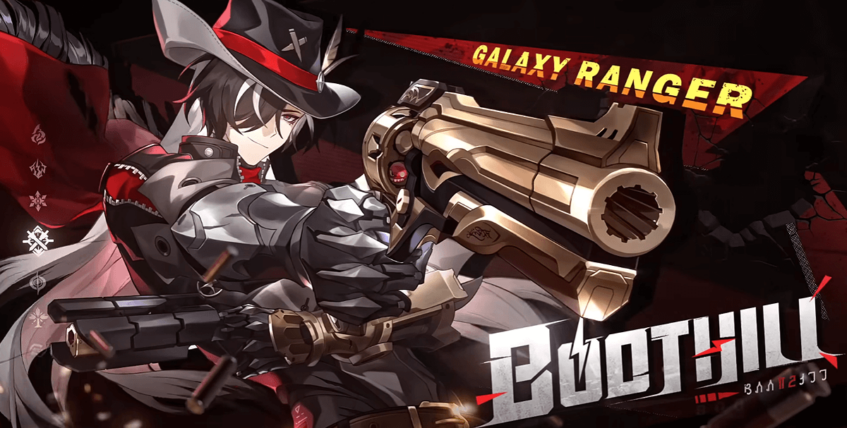
Boothill made his first appearance in Penacony. He is an optimistic and unrestrained member of the Galaxy Rangers, drifting among the stars. As a cyborg space cowboy, Boothill loves to draw attention, particularly from the Interastral Peace Corporation.
Jump To a Section:
Boothill Best Build
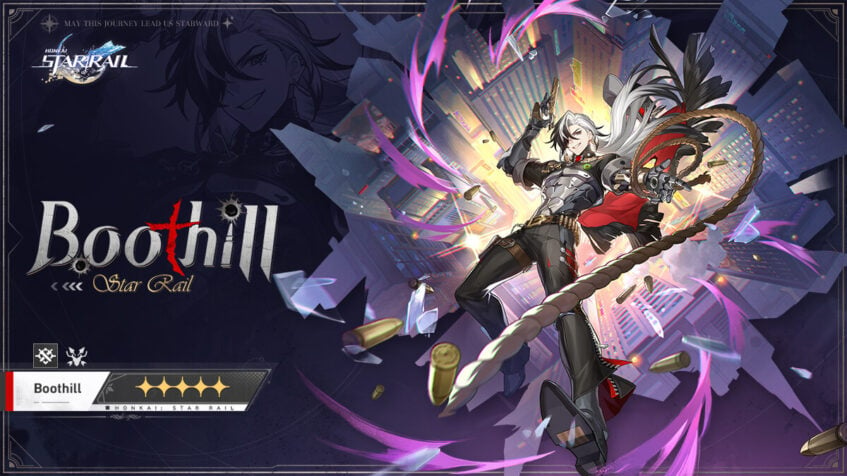
Boothill finally appeared in Version 2.1 and was released in Version 2.2. The cyborg cowboy is a 5-star character with a Physical element and follows the Path of Hunt.
He focuses on explosive burst damage and has impressive energy generation. A break effect-focused hypercarry that is easy to build and enjoy.
Best Set
| Best Relic Set | Best Planar Set | Best Light Cone |
|---|---|---|
 |  | |
| Thief of Shooting Meteor | Talia: Kingdom of Banditry | Sailing Towards A Second Life |
His Relic Set is pretty much straightforward. Since Boothill scales from Break Effect, you would want a 4-piece Thief of Shooting Meteor for its BE% and additional Energy Generation.
For the Planetary Ornament Set, go for Talia: Kingdom of Banditry for another Break Effect% and an additional 20% once you have each 145 or higher Speed.
Sailing Towards A Second Life, his signature Light Cone, is highly recommended due to its high 60% Break Effect. The Break DMG also ignores 20% of the target's DEF and to top it all, if Boothill's Break Effect in battle is at 150% or greater, his SPD increases by 12%.
Recommended Stats
As mentioned, Boothill is easy to build since he scales from Break Effect, and since Break Effect does not require CRIT, you can focus on SPD and BE% instead. Here are the suggested stats for our space cowboy.
| Substats Priority: SPD(134+) > Break Effect%(250%+) > CRIT Rate = CRIT DMG | |||
| Body: CRIT Rate / CRIT DMG | Feet: SPD | ||
| Planar Sphere: Physical DMG | Link Rope: Break Effect% | ||
Note: To fully benefit from Talia: Kingdom of Banditry, you would want Boothill's speed to reach 145+, which would be easy to obtain if you had his signature light cone. Once the ideal SPD is achieved, invest everything in Break Effect%. With Boothill's Ghost Load ability, you will only need CRIT Rate and CRIT DMG at least 55%+ out of combat
Boothill Alternate Light Cones
| Light Cone | Effects | ||
 Swordplay | For each time the wearer hits the same target, DMG dealt increases by 8% – 16%, stacking up to 5 time(s). This effect will be dispelled when the wearer changes targets. Obtained From: Stellar Warp | ||
| Swordplay (S5) will be a good alternative if you don't have Boothill's signature light cone. It is perfect for a boss nuker but may perform poorly in fights where you have to swap targets often. | |||
 River Flows in Spring | After entering battle, increases the wearer's SPD by 8% – 12% and DMG by 12% – 24%. When the wearer takes DMG, this effect will disappear. This effect will resume after the end of the wearer's next turn. Obtained From: Forgotten Hall Manifest Store | ||
| River Flows in Spring (S5) is another alternative Light Cone suitable for Boothill when you lack SPD. Although the effect disappears once he takes damage, this Light Cone would be ideal if you have a tank on your team. However, with Boothill's taunt, you must defeat the target before they land a hit. | |||
 Cruising in the Stellar Sea | Increases the wearer's CRIT rate by 8% – 16%, and increases their CRIT rate against enemies with HP less than or equal to 50% by an extra 8% – 16%. When the wearer defeats an enemy, their ATK is increased by 20% – 40% for 2 turn(s). Obtained From: Herta's Store | ||
| Cruising in the Stella Sea (S5) is the easiest Light Cone to obtain for Boothill. Since he can easily defeat an enemy, maintaining the on-kill ATK% buff should be straightforward. However, the performance of this Light Cone will be reduced in fights where the ATK% buff can't be maintained, such as lengthy boss battles. | |||
Boothill Alternate Relic Set
DEF Ignore
| Relic Set | Effects | ||
 (4-piece) Genius of Brilliant Stars | (2) Increases Quantum DMG by 10%. (4) When the wearer deals DMG to the target enemy, ignores 10% DEF. If the target enemy has Quantum Weakness, the wearer additionally ignores 10% DEF. | ||
| Genius of Brilliant Stars should be a decent alternative for its DEF ignore since Break does not scale off of CRIT, but you must have a high DEF Shred ally (e.g. Pela) to enjoy the result thoroughly. Instead of adding a DEF Shred ally to your team, I highly advise selecting the best overall ally rather than trying to make this relic perform perfectly. | |||
Break Effect
| Relic Set | Effects | ||
 (2-piece) Watchmaker, Master of Dream Machinations | (2) Increases Break Effect by 16%. | ||
(2-piece) Thief of Shooting Meteor | (2) Increases Break Effect by 16% | ||
| Sacrificing Energy Regeneration from 4-piece Theif comes with an additional BE%. With (2) Watchmaker and (2) Thief, you get a permanent 32% increase in Break Effect. | |||
SPD + Break Effect
| Relic Set | Effects | ||
 (2-piece) Messenger Traversing Hackerspace | (2) Increases SPD by 6%. | ||
(2-piece) Thief of Shooting Meteor | (2) Increases Break Effect by 16% | ||
| Best of both worlds. The combination of Hackerspace and Thief is recommended for those who didn't have enough SPD to reach the breakpoint, added with BE% for more damage. | |||
Boothill Alternate Planetary Set
| Relic Set | Effects | ||
 (2-piece) Inert Salsotto | (2) Increases the wearer's CRIT Rate by 8%. When the wearer's current CRIT Rate reaches 50% or higher, the wearer's Ultimate and follow-up attack DMG increases by 15%. | ||
| If Talia: Kingdom of Banditry is not available for you, other DPS set work, such as Inert Salsotto, for additional damage to your Ult. | |||
 (2-pieces) Rutilant Arena | (2) Increases the wearer's CRIT Rate by 8%. When the wearer's current CRIT Rate reaches 70% or higher, the wearer's Basic ATK and Skill DMG increase by 20%. | ||
| Rutilant Arena is another alternative for Talia. In combat, Boothill can easily reach the 70% CRIT Rate, efficiently receiving the 20% increase in Basic ATK and SKILL DMG. If Rutilant Arena is not available, Firmament Frontline is also suitable. | |||
Boothill Best Team
Nuke Team
 Ruan Mei |  Robin |  Bronya |
| Ruan Mei provides RES PEN, which is great for boosting Boothill's Break. With the enemy delay, you can hit first before they can deal damage, increasing your survivability. Bronya provides the necessary SPD to reach breakpoints. | ||
If Bronya is not available, Silverwolf or Pela would be a good alternative. You may also replace Robin with Gallagher or Asta.
Super Break Team
 Ruan Mei |  Gallagher |  Trailblazer (Harmony) |
| HMC (Harmony MC) with Ruan Mei increases the delay, which increases survivability. Break Vulnerability is at its highest with this team comp, which may be too overkill. | ||
Overview
Skills
| Skills | Effects |
|---|---|
| Skullcrush Spurs (Basic Attack) | Deals Physical DMG equal to 50% – 110% of Boothill's ATK to a single target enemy. |
| Fanning the Hammer (Basic Attack Enhanced) | Deals Physical DMG equal to 110% – 242% of Boothill's ATK to a single target enemy. The Enhanced Basic Attack cannot recover Skill Points and can only target the enemy that is in the Standoff. |
| Sizzlin' Tango (Skill) | Forces Boothill and a single target enemy into the Standoff state. Boothill's Basic ATK gets Enhanced, and he cannot use his Skill, lasting for 2 turn(s). This duration reduces by 1 at the start of Boothill's every turn. The enemy target in the Standoff becomes Taunted. When this enemy target/Boothill gets attacked by the other party in the Standoff, the DMG they receive increases by 15% – 33%/15%. After this target is defeated or becomes Weakness Broken, Boothill gains 1 stack of Pocket Trickshot, then dispels the Standoff. This Skill cannot regenerate Energy. After using this Skill, the current turn does not end. |
| Dust Devil's Sunset Rodeo (Ultimate) | Applies Physical Weakness to a single target enemy, lasting for 2 turn(s). Deals Physical DMG equal to 240% – 432% of Boothill's ATK to the target and delays their action by 30% – 42%. |
| Five Peas in a Pod (Talent) | Each stack of Pocket Trickshot increases the Enhanced Basic Attack's Toughness Reduction by 50%, stacking up to 3 time(s). If the target is Weakness Broken while the Enhanced Basic ATK is being used, based on the number of Pocket Trickshot stacks, deals Break DMG to this target equal to 35% – 77%/60% – 132%/85% – 187% of Boothill's Physical Break DMG. The max Toughness taken into account for this DMG cannot exceed 16 times the base Toughness Reduction of the Basic Attack “Skullcrush Spurs.” After winning the battle, Boothill can retain Pocket Trickshot for the next battle. |
| 3-9x Smile (Technique) | After the Technique is used, when casting the Skill for the first time in the next battle, applies the same Physical Weakness to the target as the one induced by the Ultimate, lasting for 2 turn(s). |
Traces
| Major Traces | Effects |
|---|---|
| Ghost Load (A2) | Increase this character's CRIT Rate/CRIT DMG, by an amount equal to 10%/50% of Break Effect, up to a max increase of 30%/150%. |
| Above Snakes (A4) | While Boothill is in the Standoff, reduces the DMG he receives from targets that are not in the Standoff by 30%. |
| Point Blank (A6) | When in Standoff and gaining Pocket Trickshot, regenerates 10 Energy. Can also trigger this effect when gaining Pocket Trickshot stacks that exceed the max limit. |
Eidolons
| Eidolons | Effect |
|---|---|
| Dusty Traill's Lone Star (Eidolon 1) | When the battle starts, obtains 1 stack of Pocket Trickshot. When Boothill deals DMG, ignores 16% of the enemy target's DEF |
| Milestonemonger (Eidolon 2) | When in Standoff and gaining Pocket Trickshot, recovers 1 Skill Point(s) and increases Break Effect by 30%, lasting for 2 turn(s). Can also trigger this effect when gaining Pocket Trickshot stacks that exceed the max limit. But cannot trigger repeatedly within one turn. |
| Marble Orchard's Guard (Eidolon 3) | Ultimate Lv. +2, up to a maximum of Lv. 15. Basic ATK Lv. +1, up to a maximum of Lv. 10. |
| Cold Cuts Chef (Eidolon 4) | When the enemy target in the Standoff is attacked by Boothill, the DMG they receive additionally increases by 12%. When Boothill is attacked by the enemy target in the Standoff, the effect of him receiving increased DMG is offset by 12%. |
| Stump Speech (Eidolon 5) | Skill Lv. +2, up to a maximum of Lv. 15. Talent Lv. +2, up to a maximum of Lv. 15. |
| Crowbar Hotel's Raccoon (Eidolon 6) | When triggering the Talent's Break DMG, additionally deals Break DMG to the target equal to 40% of the original DMG multiplier and additionally deals Break DMG to adjacent targets equal to 70% of the original DMG multiplier. |
Ascension Materials
Looking for Boothill's Ascension Materials? Here is the list you need from Level 1 – Level 80!
Level 1 – 80
| Materials | Obtain From |
|---|---|
| 308,000x Credit | Calyx: Great Mine |
| 15x Shards of Desires | Simulated Universe Enemies Memory Zone Meme Equilibrium Level 4+ Omni-Synthesizer (Synthesis & Exchange) |
| 65x IPC Work Permit | Stagnant Shadow: Clock Studios Theme Park Omni-Synthesizer (Exchange) |
| 15x Fragments of Impression | Simulated Universe Enemies Memory Zone Meme Equilibrium Level 2+ Omni-Synthesizer (Synthesis & Exchange) |
| 15x Tatters of Thought | Simulated Universe Enemies Calyx: Golden Memory Zone Meme Omni-Synthesizer (Exchange) Embers Exchange |


